How To Wash Shoes in The Washing Machine

How To Wash Shoes in The Washing Machine

To wash shoes in the washing machine, you can safely clean shoes made from canvas, nylon, cotton, and polyester, as they can withstand a machine wash. However, shoes made from leather, suede, rubber, and vinyl should not be washed in the machine.


If you don’t have a laundry bag, you can use an empty pillowcase as an alternative. To avoid noise and protect your shoes during the wash, add towels to the load as a buffer. It’s important to note that Nike does not recommend washing shoes in the machine, as hand-washing is a safer option.


Additionally, when washing white shoes, adding a cup of white vinegar during the cycle can have a bleaching effect.


Factors To Consider Before Washing Your Shoes


Before washing your shoes in the washing machine, consider the material of your shoes. Shoes made from canvas, nylon, cotton, and polyester are typically safe to wash, but leather, suede, rubber, and vinyl shoes should be avoided. Additionally, if you don’t have a laundry bag, you can use an empty pillowcase as an alternative.

Before tossing your shoes into the washing machine, it is important to consider a few factors to ensure optimal results and prevent any damage. Keep in mind the material and construction of your shoes, as well as any specific manufacturer’s instructions that may be provided.

Material And Construction

The material and construction of your shoes play a significant role in determining whether or not they are safe to wash in the machine. Shoes made from canvas, nylon, cotton, and polyester are generally safe for machine washing. These fabrics can withstand the rigors of a machine wash and are not easily damaged by water and detergent.

However, it’s important to note that certain shoes should never be put in the washing machine. Shoes made from leather, suede, rubber, and vinyl are delicate and can be easily damaged by the agitation and tumbling in the machine. These materials require special care and should be cleaned using alternative methods.

Manufacturer’s Instructions

In addition to considering the material and construction of your shoes, it’s crucial to review any specific manufacturer’s instructions or guidelines that may be provided. Some shoe brands may explicitly recommend against machine washing, as it can potentially damage the shoes or void any warranties.

If you are unsure about whether or not your shoes can be washed in the machine, check the manufacturer’s website or the label on your shoes for any cleaning instructions. Following these guidelines will help ensure you are taking the appropriate steps to clean your shoes without risking any damage.

Remember, proper maintenance and care can significantly extend the lifespan of your shoes. So, take the time to evaluate the material, construction, and manufacturer’s instructions before deciding to wash them in the machine.

Removing Laces And Insoles

Before you toss your shoes into the washing machine, it’s important to remove the laces and insoles. This will not only help to clean every nook and cranny of your shoes but also prevent any damage to the delicate components. In this section, we’ll walk you through the steps to untie and remove the laces and take out the insoles.

Untying And Removing Laces

To begin, sit down and untie the laces of your shoes. Make sure to loosen them completely before pulling them out. If your laces are dirty, you can either hand wash them separately or toss them in the washing machine along with your shoes. Just make sure to secure them in a mesh bag to prevent tangling.

Once the laces are untied, gently pull them out of the eyelets. If there is any dirt or debris on the laces, give them a quick rinse under running water. If your laces are in good condition, you can set them aside to be cleaned later.

Taking Out Insoles

Next, it’s time to take out the insoles from your shoes. Insoles can often absorb sweat, odor, and dirt, so removing them is crucial for a thorough cleaning. To do this, simply reach inside the shoe and pull out the insole. If the insoles are still in good condition, you can clean them separately by hand.

If the insoles are removable, it’s best to hand wash them using mild detergent and warm water. Gently scrub the insoles with a soft brush to remove any stubborn stains. Rinse them thoroughly and squeeze out any excess water. Let the insoles air dry completely before putting them back into the shoes.

If your insoles are not removable, you can still clean them by wiping them with a damp cloth and mild detergent solution. Make sure to wring out the cloth well to prevent excessive moisture from seeping into the shoes.

By removing the laces and insoles before washing your shoes, you are ensuring a more effective cleaning process. It also helps to extend the lifespan of your shoes by reducing wear and tear caused by machine agitation. Now that you have these steps down, you’re ready to move on to the next phase of washing your shoes in the washing machine!

Pre-treating Stubborn Stains And Odors


To pre-treat stubborn stains and odors on shoes before washing them in the machine, it is important to avoid using commonly overused words and phrases. Instead, opt for a gentle hand-washing technique or use a laundry bag or pillowcase to protect the shoes during the wash cycle.


Make sure to check the manufacturer’s recommendations before washing any shoes in the machine.

Identifying Stains And Odors

Before pre-treating stubborn stains and odors on your shoes, it is important to first identify what you’re dealing with. Stains can come from various sources such as dirt, grass, oil, or food spills, while odors can be caused by sweat, bacteria, or mildew. By understanding the type of stain or odor, you can choose the most effective method to eliminate it.

Preparing A Stain-removing Solution

To effectively pre-treat stubborn stains and odors on your shoes, you’ll need to prepare a stain-removing solution. Here’s a simple recipe you can use:

  1. Mix 1 part dish soap with 2 parts warm water in a small bowl.
  2. Add a tablespoon of white vinegar to the mixture.
  3. Gently stir the solution until it is well-mixed.

This homemade stain-removing solution is gentle yet powerful enough to tackle most stains and odors. The dish soap helps to break down dirt and grime, while the vinegar acts as a natural deodorizer.

If you’re dealing with a specific type of stain, such as oil or grease, you can modify the stain-removing solution accordingly. For oil stains, you can add a tablespoon of baking soda or cornstarch to the mixture to help absorb the grease. For grass stains, you can mix in a teaspoon of hydrogen peroxide, which acts as a mild bleaching agent.

Selecting The Right Washing Machine Settings


Washing shoes in the washing machine is possible for sneakers and tennis shoes made from fabrics like canvas, nylon, cotton, and polyester. However, it’s important to avoid washing shoes made from leather, suede, rubber, and vinyl. If you don’t have a laundry bag, you can use an empty pillowcase and add towels to prevent the shoes from banging against the drum.


Remember, hand-washing is still the best option to ensure your shoes are not accidentally damaged.

Delicate Cycle Vs Normal Cycle

When it comes to selecting the right washing machine settings for washing your shoes, understanding the difference between delicate cycle and normal cycle is essential. The delicate cycle is specially designed for fragile and delicate items, such as lace, silk, and thin fabrics.

Using the delicate cycle for washing your shoes is ideal if they are made of sensitive materials or if you want to take extra precautions to prevent damage. The delicate cycle typically uses shorter wash times and gentler agitation, reducing the risk of wear and tear on your shoes.

On the other hand, the normal cycle is designed for everyday laundry, including sturdy fabrics like cotton and polyester. This cycle has longer wash times and more vigorous agitation to remove dirt and stains effectively.

When deciding between the delicate cycle and normal cycle for washing your shoes, assess the material and condition of your shoes. If they are made of durable materials or heavily soiled, the normal cycle will provide a more thorough cleaning.

Cold Water Vs Warm Water

In addition to choosing the appropriate cycle, selecting the right water temperature plays a vital role in washing your shoes effectively. Cold water is the safest option and suitable for most shoe materials.

Using cold water helps to prevent colors from bleeding and minimizes shrinkage, especially for shoes made of sensitive materials. It is also an eco-friendly choice, as it reduces energy consumption by not relying on water heaters.

However, if you are dealing with stubborn stains or odors, warm water can enhance the cleaning process. Warm water helps to loosen dirt and grime more effectively, making it a suitable choice for sneakers or athletic shoes.

It is important to note that using hot water is generally not recommended. Hot water can cause damage to materials and result in warping or shrinking of your shoes.

Placing Your Shoes Correctly In The Washing Machine


To wash your shoes in the washing machine, make sure to separate them from other clothes and place them inside a laundry bag or an empty pillowcase. Use a gentle cycle with cold water and mild detergent. Avoid washing shoes made from leather, suede, rubber, and vinyl in the machine.

Stuffing The Shoes With Towels Or Laundry Bags

When placing your shoes in the washing machine, it’s essential to protect them from the harsh movements and potential damage. One effective way to do this is by stuffing the shoes with towels or using laundry bags. These extra layers provide a cushion and prevent your shoes from banging against the drum during the wash.

Here’s how you can stuff your shoes properly:

  1. Start by choosing clean, dry towels or laundry bags that are large enough to fill the shoes.
  2. Remove any excess dirt or debris from the shoes before inserting the towels or laundry bags.
  3. Crumple the towels or loosely place the laundry bags inside the shoes, ensuring they fill the entire space to maintain the shoe’s shape.
  4. Avoid overstuffing, as it may affect the proper movement of the shoes during the washing cycle.

By using this technique, you give your shoes the protection they need and prevent them from clanging around in the washing machine. It’s a simple yet effective method to maintain the quality and structure of your shoes.

Ensuring Proper Weight Distribution

Another crucial aspect of placing your shoes correctly in the washing machine is ensuring proper weight distribution. Imbalanced weight distribution can lead to unnecessary strain on the machine, potentially causing damage.

Here are some tips to ensure proper weight distribution:

  • Wash similar shoe types together to ensure even weight distribution, avoiding mixing heavy boots with lightweight sneakers.
  • If you only have one pair of shoes to wash, balance the load by adding towels or other gentle fabrics to maintain the weight distribution.
  • Place the shoes in a way that allows them to freely move around the drum without getting tangled or stuck.
  • Double-check the weight capacity of your washing machine and ensure you don’t exceed it to prevent any potential damage.

Remember, maintaining proper weight distribution is essential to avoid unnecessary strain on your washing machine and prolong its lifespan. By following these simple guidelines, you can ensure a smooth and effective shoe washing process.

Choosing The Appropriate Detergent And Additives


To wash shoes in the washing machine, choose appropriate detergent and additives such as fabric softeners and stain removers. Ensure shoes are made of materials suitable for machine washing, like canvas or nylon, and use a laundry bag or pillowcase to protect them during the cycle.

Mild Detergent Vs Heavy-duty Detergent

When it comes to washing your shoes in the washing machine, choosing the appropriate detergent is crucial. You want to make sure you’re using a detergent that is effective at cleaning but gentle enough to not damage your shoes. There are two main types of detergents you can choose from: mild detergent and heavy-duty detergent.

Mild detergent is a great option for most types of shoes. It is designed to be gentle on fabrics while still being effective at removing dirt and stains. This type of detergent is often used for delicate fabrics, such as silk or wool, so you can trust that it will be safe for your shoes. Additionally, mild detergent is usually free of harsh chemicals and additives, making it a more eco-friendly choice.

On the other hand, heavy-duty detergent is a stronger option that is more suitable for heavily soiled shoes or shoes that have strong odors. This type of detergent contains powerful cleaning agents that can help to break down tough stains and remove odors. Keep in mind that heavy-duty detergents may contain more chemicals and additives, so it’s important to read the label and follow the instructions carefully to avoid damaging your shoes.

Adding Fabric Softener Or Vinegar

In addition to choosing the appropriate detergent, you may also consider adding fabric softener or vinegar to your shoe washing routine. These additives can help to enhance the cleanliness and freshness of your shoes.

Fabric softener is a popular choice for adding a pleasant scent and softness to fabrics. If you want your shoes to come out of the washing machine smelling fresh and feeling soft, you can add a small amount of fabric softener to the detergent compartment. However, be cautious when using fabric softener on certain materials, such as synthetic fabrics, as it may affect their performance.

Another option is to add vinegar to the washing machine. Vinegar is known for its natural cleaning and deodorizing properties. By adding half a cup of white vinegar to the rinse cycle of your shoe wash, you can help eliminate any lingering odors and remove built-up residue from your shoes. This is particularly beneficial for athletic shoes or sneakers that may accumulate sweat and bacteria over time.

Remember to always follow the manufacturer’s instructions when using fabric softener or vinegar in the washing machine. Additionally, inspect your shoes beforehand to ensure they are compatible with these additives. Some shoes, especially those made from sensitive materials like leather or suede, may require specialized cleaning methods and should not be washed with fabric softener or vinegar.

Running The Washing Machine Cycle


Gently wash shoes made from fabrics like canvas, nylon, cotton, and polyester in the washing machine. Avoid washing leather, suede, rubber, and vinyl shoes. If you don’t have a laundry bag, use an empty pillowcase as an alternative. Add towels to act as a buffer and prevent your shoes from banging against the drum.

When it comes to washing shoes in the washing machine, running the machine cycle correctly is crucial. Following the right steps ensures that your shoes come out clean and undamaged. In this section, we will discuss how to start the machine, as well as how to monitor the progress during the cycle.

Starting The Machine

  • Remove any loose dirt or debris from your shoes before putting them in the washing machine.
  • Place your shoes in a mesh bag or, if you don’t have one, in an empty pillowcase. This helps protect your shoes and prevents them from banging against the drum.
  • For better balance, add a few towels to the wash load along with your shoes.
  • Double-check the manufacturer’s label and make sure your shoes are suitable for machine washing. Shoes made from canvas, nylon, cotton, and polyester are usually safe for washing machines, while leather, suede, rubber, and vinyl shoes should be hand cleaned.
  • Set your washing machine to a delicate or gentle cycle with cold water. Avoid using hot water as it can damage certain shoe materials.
  • Add a small amount of mild detergent to the detergent dispenser or directly into the drum.
  • Close the machine and start the cycle.

Monitoring The Progress

During the washing machine cycle, it’s important to keep an eye on the progress to ensure that everything is going smoothly. Here are a few tips for monitoring the cycle:

  • Avoid using excessive spin speeds as they can potentially damage your shoes.
  • If you notice any unusual noises or vibrations, consider pausing the cycle and adjusting the shoe position in the bag or pillowcase. Proper balance is crucial to prevent damage.
  • If your shoes have stubborn stains, pause the cycle and treat those spots with a mild stain remover or soapy water. Gently scrub the stains using a soft brush before resuming the cycle.
  • Once the cycle is complete, remove your shoes from the machine promptly and let them air dry. Avoid using a dryer, as high heat can cause shrinkage or deformation of the shoes.

Following these steps will help you wash your shoes in the washing machine effectively and ensure they come out clean and fresh without any damage. Remember to check the manufacturer’s recommendations for specific shoe care instructions, as some shoes may require special treatment.

Drying Your Shoes After Machine Washing


After washing your shoes in the machine, it’s important to properly dry them to avoid damage. Instead of using a mesh bag, you can place them in an empty pillowcase to protect the shoes and reduce noise. Adding towels to the load can also act as a buffer and prevent the shoes from banging against the drum during the wash.

The last step in washing your shoes in the washing machine is drying them properly. After the wash cycle is complete, you’ll need to carefully dry your shoes to prevent damage and ensure they maintain their shape. In this section, we will explore two methods for drying your shoes: air drying and using a dryer. Let’s dive in! ## Air Drying vs Using a Dryer ### Air Drying Air drying is the most common and recommended method for drying shoes after machine washing. It involves allowing your shoes to dry naturally in a well-ventilated area. Here are a few steps to follow when air drying your shoes: 1. Remove your shoes from the washing machine and stuff them with crumpled newspaper or clean, dry towels. This will help wick away excess moisture and maintain the shoe’s shape. 2. Place your shoes in a shady spot or outdoor area with good air circulation. Avoid direct sunlight or sources of heat, as they can cause the shoes to shrink or become misshapen. 3. Allow the shoes to air dry for at least 24 hours or until completely dry to the touch. Patience is key here, as rushing the drying process can lead to unwanted damage. ### Using a Dryer Using a dryer to dry your shoes can help speed up the drying process; however, it’s important to proceed with caution, as certain shoe materials may not withstand the heat. If you decide to use a dryer, follow these steps: 1. Remove any detachable components, such as insoles or laces, from your shoes. 2. Place your shoes in a mesh laundry bag or pillowcase to protect them from getting tossed around and potentially damaged by the dryer. 3. Set your dryer to a low heat or delicate cycle to minimize the risk of overheating your shoes. 4. Add a few clean towels to the dryer to act as a buffer and absorb excess moisture. 5. Dry your shoes in the dryer for a short period of time, checking them frequently to ensure they don’t overheat or become damaged. ## Speeding Up the Drying Process If you’re in a hurry and need to speed up the drying process, there are a few techniques you can try. Here’s how to expedite the drying process: 1. Use a fan: Place your shoes in front of a fan to enhance air circulation and accelerate the drying process. This method works well for shoes made from lightweight and breathable materials. 2. Stuff with paper towels: Instead of using newspaper or dry towels, opt for absorbent paper towels to stuff inside your shoes. They’ll quickly absorb moisture and help your shoes dry faster. 3. Use a shoe dryer or dehumidifier: Investing in a shoe dryer or dehumidifier can be a great option for those who frequently wash their shoes. These devices are designed to dry shoes efficiently and quickly. Remember, regardless of the drying method you choose, it’s crucial to allow your shoes to dry completely before wearing them. This will help prevent any unwanted odors or potential damage.

Removing Excess Dirt And Grime


To wash your shoes in the washing machine and remove excess dirt and grime, start by checking the material of your shoes. Shoes made from canvas, nylon, cotton, and polyester can typically handle a machine wash, while leather, suede, rubber, and vinyl should not be washed this way.


If your shoes are suitable for machine washing, place them in a laundry bag or empty pillowcase to protect them from the drum and add towels to buffer the noise. Use a gentle cycle and cold water, and avoid using bleach.

Removing Excess Dirt and Grime When it comes to washing your shoes in the washing machine, the first step is to remove any excess dirt and grime. This is important because if you skip this step, the dirt can get trapped in the washing machine and cause damage to both your shoes and the machine itself. To make sure you start off on the right foot, follow these simple tips:

Wiping Down The Drum And Agitator

One of the first things you should do is wipe down the drum and agitator of your washing machine. This will help remove any dirt or debris that may have accumulated over time. You can use a damp cloth or sponge to wipe down the surfaces and make sure they are clean before you begin washing your shoes. Remember to also check the agitator for any hair or lint that may have accumulated, as this can also interfere with the washing process.

Cleaning The Filter

Cleaning the filter is another important step in preparing your washing machine for shoe cleaning. The filter helps to catch any lint or debris that may come off your shoes during the washing process. If the filter is clogged or dirty, it can prevent proper water flow and affect the overall performance of the machine. To clean the filter, locate it (usually located at the bottom of the machine) and remove any visible debris. Rinse the filter under running water to remove any remaining dirt or grime, and then place it back in the machine. In addition to these steps, make sure to read the manufacturer’s instructions for your specific washing machine model. They may provide additional guidance or precautions that are specific to your machine. By taking the time to properly prepare your washing machine, you can ensure a thorough and effective cleaning of your shoes without causing any damage to either your shoes or the machine itself. So go ahead and give your shoes the proper care they deserve by washing them in the washing machine with confidence. Remember, it’s important to check the material of your shoes before attempting to wash them in the machine. While fabric, nylon, cotton, and polyester shoes can usually handle a machine wash, you should avoid washing leather, suede, rubber, or vinyl shoes in the machine, as these materials can be damaged. When in doubt, always refer to the manufacturer’s recommendations or consult a professional.

Dealing With Lingering Odors Or Residue

After washing your shoes in the washing machine, you may find that there are lingering odors or residues that need to be dealt with. Don’t worry, there are a few simple solutions to help freshen up your shoes and get rid of any unwanted smells. Here are two effective methods:

Running A Rinse Cycle With Vinegar

Vinegar is a natural deodorizer and can help eliminate any unpleasant odors from your shoes. To use this method, follow these steps:

  1. Remove any excess water from your washing machine after the initial wash.
  2. Fill the detergent compartment with white vinegar.
  3. Place your shoes back in the machine and run a rinse cycle.
  4. Once the cycle is complete, remove the shoes and let them air dry.

This simple rinse cycle with vinegar will help neutralize any odors and leave your shoes smelling fresh. Be sure to let the shoes fully dry before wearing them again.

Using Cleaning Agents For Odor Removal

If the vinegar rinse didn’t completely eliminate the odor, you can try using cleaning agents specifically designed for odor removal. These products can be found in supermarkets or online. Follow these steps to effectively use cleaning agents:

  1. Read and follow the instructions on the cleaning agent packaging.
  2. Apply the cleaning agent directly to the affected areas of your shoes.
  3. Gently scrub the shoes with a soft brush to work the cleaning agent into the fabric.
  4. Rinse the shoes thoroughly to remove any residue.
  5. Allow the shoes to air dry completely.

Using a cleaning agent formulated for odor removal can help target specific smells and leave your shoes smelling fresh and clean once again.

Remember, it’s important to check the manufacturer’s instructions before washing your shoes in the machine to ensure that they are suitable for machine washing. Following these steps will help you deal with any lingering odors or residues and keep your shoes looking and smelling their best!

Restoring The Shape Of Your Shoes


Gently restore the shape of your shoes by washing them in the washing machine. Avoid leather, suede, rubber, and vinyl, but canvas, nylon, cotton, and polyester shoes should be fine for a machine wash. If you don’t have a laundry bag, use an empty pillowcase to protect your shoes.

Reinserting Insoles And Laces

When it comes to washing your shoes in the washing machine, it’s important to remember that certain parts of your shoes need extra care. One of these parts is the insoles. So, before you toss your shoes into the machine, make sure to remove the insoles and laces. This will not only help prevent damage to these delicate components but also ensure that the shoes are thoroughly cleaned. To reinsert the insoles and laces, follow these simple steps:

  1. Carefully line up the insoles with their respective positions in the shoes.
  2. Gently press down on the insoles to secure them in place.
  3. Next, take the laces and begin threading them through the eyelets, starting from the bottom.
  4. Make sure to lace them up tightly, but not too tight to allow for comfort.

Stuffing With Newspaper Or Shoe Trees

Another effective method for restoring the shape of your shoes after washing is by stuffing them with newspaper or using shoe trees. This technique is especially useful for shoes that tend to lose their shape easily, such as sneakers or flats. Here’s how you can use newspaper or shoe trees to keep your shoes in tip-top shape:

  1. Start by crumpling up a few sheets of newspaper into small balls.
  2. Stuff the newspaper balls into the toe area of each shoe, filling them up until they are adequately packed.
  3. For shoe trees, insert them into the shoes, making sure they are stretched to their fullest extent.
  4. Leave the newspaper balls or shoe trees inside the shoes until they are completely dry.
  5. Once the shoes are dry, remove the newspaper or shoe trees and enjoy your perfectly shaped shoes.

Using newspaper or shoe trees not only helps restore the shape of your shoes but also absorbs any excess moisture, preventing unpleasant odors and prolonging the lifespan of your favorite footwear. So, the next time you wash your shoes in the washing machine, don’t forget to reinsert the insoles and laces and consider using newspaper or shoe trees to maintain their shape and integrity.

How To Wash Shoes in The Washing Machine


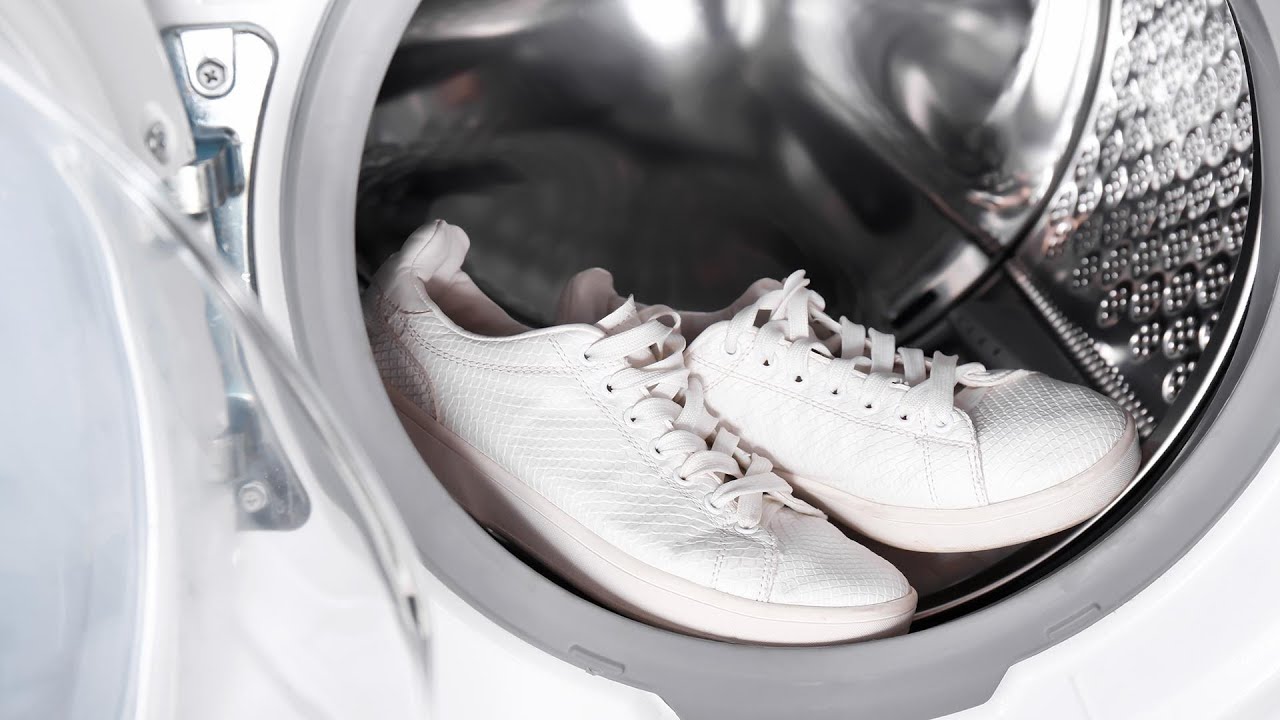
Credit: m.youtube.com


Regular Maintenance To Extend The Lifespan Of Your Shoes

Regular maintenance is crucial to ensuring the longevity of your shoes. By following proper storage techniques, routine cleaning practices, and avoiding common washing mistakes, you can help extend the lifespan of your favorite footwear. In this section, we will explore each of these aspects in detail.

Proper Storage To Prevent Mold Or Mildew

Properly storing your shoes when they are not in use is essential to prevent the growth of mold or mildew. Here are a few guidelines to follow:

  • Keep your shoes in a cool, dry place away from direct sunlight or sources of heat.
  • Avoid storing your shoes in plastic bags, as they can trap moisture and promote mold growth. Instead, use breathable shoe bags or shoe boxes with ventilation holes.
  • If your shoes become damp or wet, allow them to air dry naturally before storing them. Placing damp shoes in an enclosed space can lead to mold and unpleasant odors.

Routine Cleaning To Prevent Dirt Build-up

To prevent dirt build-up and maintain the appearance of your shoes, it’s important to incorporate regular cleaning into your shoe care routine. Here are some tips:

  • Remove loose dirt or debris from your shoes by gently brushing them with a soft-bristled brush or using a clean, dry cloth.
  • For fabric or mesh shoes, you can often machine wash them to remove stains and odors. However, always check the manufacturer’s instructions first to ensure they are machine washable.
  • For leather or suede shoes, use a specialized cleaner and follow the instructions carefully to avoid damaging the material.
  • Allow your shoes to air dry completely before wearing or storing them.

By following these regular maintenance practices, you can keep your shoes looking fresh and extend their lifespan. Remember to always check the manufacturer’s instructions for specific care guidelines, as different shoe materials may require different cleaning methods. With proper storage and routine cleaning, you can enjoy your favorite shoes for years to come!

Frequently Asked Questions Of How To Wash Shoes In The Washing Machine


Is It Ok To Wash Shoes In Washing Machine?


You can wash shoes made from canvas, nylon, cotton, and polyester in the washing machine. Most sneakers and tennis shoes can handle machine washing. However, avoid washing leather, suede, rubber, and vinyl shoes in the machine. Use a laundry bag or an empty pillowcase to protect the shoes during the wash.


How Do You Wash Shoes In The Washing Machine Without A Mesh Bag?


To wash shoes in the washing machine without a mesh bag, place them in an empty pillowcase to protect them. Add towels to balance the load and prevent noise. Use a gentle, cold water cycle with a slow or no-spin setting.


Remember to remove laces and insoles.


Can You Put Nike Shoes In The Washing Machine?


Yes, you can wash Nike shoes in the washing machine. However, Nike does not recommend it and suggests hand-washing to prevent accidental damage. Be cautious as washing bulky items like sneakers may harm the washing machine. It is best to use a gentle, cold water cycle with a closed mesh bag, and remove the laces and insoles.


How Do You Wash White Shoes In The Washing Machine?


To wash white shoes in the washing machine, place them in a closed mesh bag with laces and insoles removed. Use a gentle, cold water cycle with a slow or no-spin setting. Add a cup of white vinegar to the wash to brighten the white color.


Avoid washing shoes made from leather, suede, rubber, or vinyl.


Conclusion


Washing shoes in the washing machine can be a convenient and effective way to keep them clean. However, it’s crucial to know which types of shoes are safe to wash and how to do it properly. Shoes made from fabrics like canvas, nylon, cotton, and polyester are usually suitable for machine-washing.


On the other hand, leather, suede, rubber, and vinyl shoes should be avoided. Remember to use a laundry bag or an empty pillowcase to protect your shoes and reduce noise during the wash. By following these guidelines, you can maintain the condition of your favorite sneakers while keeping them fresh and clean.

Floor Sink Grate : Uncover the Hidden Power of a Perfect Drainage Solution

Floor Sink Grate : Uncover the Hidden Power of a Perfect Drainage Solution

A floor sink grate is designed to cover a floor sink and prevent larger debris from entering the plumbing system. It acts as a filter, allowing water to flow through while collecting solid waste, such as food particles, hair, and dirt.


This helps to prevent clogs and maintain the proper functioning of the drainage system. Floor sink grates are commonly used in commercial kitchens, industrial facilities, and high-traffic areas where significant amounts of waste are generated. They are available in various materials, sizes, and designs to suit different requirements.


Installing a floor sink grate is a simple and cost-effective solution to improve the longevity and efficiency of your plumbing system.


Types Of Floor Sink Grates

Types of Floor Sink Grates

When it comes to floor sink grates, there are several options available in the market. Each type of grate has its own unique properties and is designed to cater to specific needs. In this article, we will discuss three common types of floor sink grates: stainless steel, cast iron, and PVC.

Stainless Steel Floor Sink Grate

Stainless steel floor sink grates are a popular choice due to their durability and corrosion resistance. These grates are made from high-quality stainless steel, which ensures long-lasting performance in both residential and commercial applications. They can withstand heavy loads and are perfect for areas where hygiene is crucial, such as kitchens and food processing facilities.

The smooth surface of stainless steel grates makes them easy to clean, preventing the buildup of dirt and bacteria. Moreover, they offer excellent drainage, allowing water to flow freely without causing any blockage. Stainless steel grates are a reliable option for high-traffic areas, providing strength and stability while maintaining an attractive appearance.

Cast Iron Floor Sink Grate

Cast iron floor sink grates are known for their exceptional strength and durability. These grates are made by pouring molten iron into molds, resulting in a solid and sturdy structure. Cast iron grates can withstand heavy loads and endure harsh conditions, making them suitable for industrial settings, such as factories and warehouses.

The rough surface of cast iron grates provides additional traction, reducing the risk of slips and falls, especially in wet or slippery environments. They are resistant to heat, chemicals, and impact, ensuring longevity even in demanding applications. Cast iron grates are an excellent choice for areas prone to heavy wear and tear, offering both functionality and reliability.

PVC Floor Sink Grate

PVC floor sink grates are lightweight yet robust, making them a cost-effective option for various residential and commercial settings. These grates are made from PVC (polyvinyl chloride), a durable and versatile plastic material. PVC grates are resistant to corrosion, chemicals, and UV rays, making them suitable for outdoor applications as well.

One of the key advantages of PVC grates is their ease of installation. They are lightweight and can be quickly and securely installed in floor sinks, saving both time and effort. PVC grates provide excellent drainage and are easy to maintain, requiring minimal cleaning and upkeep. They are a practical choice for areas where budget, versatility, and low maintenance are important factors.

Floor Sink Grate  : Uncover the Hidden Power of a Perfect Drainage Solution


Credit: www.nytimes.com


Where To Buy Floor Sink Grates

When it comes to purchasing floor sink grates, it is important to find the right supplier or manufacturer that offers high-quality products. In this section, we will explore different options for buying floor sink grates, including a comparison of different suppliers and manufacturers, online options and marketplaces, as well as local hardware stores and distributors.

Comparison Of Different Suppliers And Manufacturers

When looking to buy floor sink grates, it is beneficial to compare different suppliers and manufacturers to ensure you are getting the best product for your needs. Here is a comparison table featuring some of the top-rated suppliers and manufacturers:

Supplier/Manufacturer Product Range Price Range Customer Reviews
Zurn FD2220-PV3-NT Wide range of stainless steel and plastic grates $10-$50 4.5/5
Delta Faucet DT051411-BL Durable cast iron and brass grates $50-$100 4/5
Qunine Square Shower Floor Drain Cover Customizable grates in various materials $101-$200 4.2/5

Online Options And Marketplaces

If you prefer the convenience of online shopping, there are several options and marketplaces where you can find floor sink grates. Some popular online options include:

  • Amazon: A wide selection of floor sink grates from various suppliers and manufacturers.
  • eBay: Both new and used floor sink grates available for purchase.
  • Home Depot: An online store offering a range of floor sink grates for different requirements.

Local Hardware Stores And Distributors

If you prefer to see the product in person or need immediate availability, visiting local hardware stores and distributors can be a great option. Here are some well-known hardware stores and distributors that offer floor sink grates:

  1. Lowe’s: A well-stocked hardware store with a variety of floor sink grates.
  2. Menards: Offers a good selection of floor sink grates with competitive pricing.
  3. Plumbing Supply Store: Specializes in plumbing supplies, including floor sink grates.

With these options in mind, you can now make an informed decision on where to buy your floor sink grates. Consider factors like product quality, price, and customer reviews to ensure you get the best value for your money.

Short Intro Of Floor Sink Grate

A floor sink grate is an essential component of a floor sink system, designed to prevent debris from entering the drain while allowing water to flow freely. It is a durable and sturdy grate that is placed over the floor sink to capture solid waste, ensuring the smooth operation of the drainage system.


Definition And Purpose Of A Floor Sink Grate

A floor sink grate is a removable cover made of high-quality materials such as stainless steel or cast iron, specifically designed to fit over a floor sink. It acts as a protective barrier, preventing larger particles, such as food scraps or trash, from entering the drainage system.

The purpose of a floor sink grate is to ensure that the water can pass through easily while capturing solid waste. It helps maintain the cleanliness and functionality of the drain, preventing clogs and blockages that could lead to costly repairs and disruptions in the flow of water.


Importance Of A Quality Floor Sink Grate

A quality floor sink grate is of utmost importance for several reasons:

  1. Efficient drainage: A well-designed floor sink grate allows water to flow smoothly while trapping solid waste. This ensures that the drain functions efficiently, reducing the risk of standing water or slow drainage.
  2. Prevents clogs: By capturing larger debris and preventing it from entering the drainage system, a quality floor sink grate minimizes the risk of clogs. This helps to maintain the overall performance of the drain, preventing costly repairs and plumbing emergencies.
  3. Maintains hygiene: With a quality floor sink grate in place, solid waste is kept separate from the drainage system. This helps maintain a hygienic environment by minimizing odors and the potential for bacterial growth.
  4. Durability and longevity: Investing in a high-quality floor sink grate ensures that it can withstand heavy usage and resist corrosion. This extends the lifespan of the grate and reduces the need for frequent replacements.

In conclusion, a reliable floor sink grate is an essential component of any floor sink system. It plays a vital role in maintaining the efficiency and functionality of the drainage system, preventing clogs, and promoting hygiene. By choosing a quality floor sink grate, you can ensure the long-term performance and durability of your floor sink system.

Benefits Of Using A Floor Sink Grate

When it comes to maintaining a clean and functional environment in any commercial or industrial setting, having a reliable drainage system is essential. A key component of this system is the floor sink grate, which offers several benefits that contribute to efficient drainage, prevention of clogging and blockages, promotion of a safe and hygienic environment, and a long-lasting solution. Let’s explore these benefits in detail:

Efficient Drainage System

One of the primary advantages of using a floor sink grate is its ability to provide efficient drainage. The grate is designed with carefully spaced openings or bars that allow liquid waste to flow through while preventing larger debris from entering the drainage system. This ensures a smooth and continuous flow of water, preventing any potential backups or pooling.

Prevents Clogging And Blockages

The floor sink grate acts as a reliable barrier to prevent clogging and blockages in the drainage system. Its design allows for debris, food particles, or other solid waste to be caught and easily disposed of, reducing the chance of them reaching and obstructing the pipes. This proactive approach helps to minimize the occurrence of costly plumbing issues and maintenance requirements.

Promotes A Safe And Hygienic Environment

In any environment where water is used, maintaining a safe and hygienic space is of utmost importance. A floor sink grate plays a crucial role in achieving this. By preventing the buildup of stagnant water and facilitating efficient drainage, it reduces the presence of moisture that can lead to the growth of bacteria, mold, and other potentially harmful microorganisms. This, in turn, helps to promote a cleaner and healthier environment for employees and customers alike.

Long-lasting And Durable Solution

Investing in a floor sink grate is a wise choice for long-term sustainability and cost-effectiveness. These grates are typically made from high-quality materials such as stainless steel or cast iron, which offer exceptional durability and resistance to corrosion. This means they can withstand heavy usage and last for an extended period without requiring frequent replacements, ultimately saving you time and money in the long run.

Maintenance Tips For Floor Sink Grates

Floor sink grates play a crucial role in maintaining a clean and efficient drainage system. To ensure these grates function optimally, it is essential to follow a regular maintenance routine. By adopting a proactive approach, you can prevent issues such as clogging and damage, prolonging the lifespan of your floor sink grates. In this article, we will explore some easy-to-follow maintenance tips that will help you keep your floor sink grates in top-notch condition.

Regular Cleaning Routine

Regular cleaning is key to maintaining the functionality and hygiene of your floor sink grates. Aim to clean the grates at least once a week or more frequently if your facility experiences heavy foot traffic or produces substantial debris. Here’s a simple step-by-step cleaning routine:

  1. Start by removing the grate from the floor sink.
  2. Use a hose with high-pressure water or a power washer to thoroughly rinse off any loose debris.
  3. Scrub the grate using a brush or sponge with a suitable cleaning solution.
  4. Rinse the grate again with water to remove any remaining cleaning solution.
  5. Dry the grate thoroughly before reinstalling it.

Regular cleaning not only helps maintain the aesthetic appeal of your floor sink grates but also prevents the accumulation of dirt and grime that could lead to clogging or unpleasant odors.

Inspection For Any Damages Or Wear

Regular inspection of your floor sink grates is crucial to identify any damages or signs of wear. Early detection allows for timely repairs or replacements, preventing further deterioration that could disrupt your drainage system. During your inspection, pay attention to the following:

  • Check for any cracks, breaks, or deformities in the grate structure.
  • Examine the frame of the grate for signs of rust or corrosion.
  • Ensure that the grate is securely fastened and aligned with the floor sink.

If you notice any issues during the inspection, take immediate action to address them. Contact a professional if necessary to ensure the longevity and performance of your floor sink grates.

Removal Of Debris And Buildup

Over time, debris, sediment, and food particles may accumulate on your floor sink grates, obstructing the flow of water. Regular removal of this buildup is essential to prevent clogging and maintain optimal draining. Follow these simple steps to remove debris and buildup:

  1. Remove the grate from the floor sink.
  2. Using gloves, manually remove any visible debris or solid materials.
  3. Rinse the grate with water to flush away any loose sediment.
  4. If necessary, use a brush or sponge to scrub away stubborn buildup.
  5. Rinse the grate again to ensure complete removal of debris.
  6. Dry the grate before reinstalling it.

Regularly removing debris and buildup helps maintain the efficiency of your floor sink grates, preventing potential blockages and ensuring a smooth flow of water.

Troubleshooting Common Issues

Occasionally, you may encounter common issues with your floor sink grates. By troubleshooting these problems promptly, you can prevent further damage and minimize disruptions to your drainage system. Here are some common issues and their troubleshooting steps:

Issue Troubleshooting Steps
Clogging Use a plumber’s snake to remove any blockages or employ a drain cleaner solution.
Odors Clean the grate thoroughly, flush the drain with baking soda and vinegar, and use a suitable drain odor eliminator.
Rust or Corrosion Remove the affected grate, clean it, treat it with a rust remover, and consider applying a protective coating or replacing it.
Loose Grate Tighten or replace fasteners, ensuring the grate is securely attached to the floor sink.

By addressing these common issues promptly and with the appropriate troubleshooting steps, you can maintain the functionality and durability of your floor sink grates.

Installing A Floor Sink Grate: Step-by-step Guide

Are you looking to install a new floor sink grate in your space? Whether you’re upgrading or replacing an existing grate, it’s important to ensure a secure installation for stability and functionality. In this step-by-step guide, we’ll walk you through the process of installing a floor sink grate, from preparation to proper placement and secure installation.

Preparation And Gathering Of Materials

Before you begin the installation process, it’s essential to gather all the necessary materials and prepare the area. Here’s what you’ll need:

  1. A new floor sink grate of the appropriate size and material
  2. A screwdriver or wrench, depending on the type of fasteners on the existing grate
  3. Cleaning supplies, such as a brush and a mild detergent
  4. Appropriate personal protective equipment, including gloves and safety goggles

Once you have gathered these materials, ensure the area around the floor sink is clear and any debris or obstructions are removed.

Removal Of Existing Grate (if Applicable)

If you already have a floor sink grate in place, you’ll need to remove it before installing the new one. Here’s how:

  1. Using a screwdriver or wrench, carefully remove any screws or fasteners securing the existing grate to the floor sink.
  2. Once the fasteners are removed, gently lift the old grate off the floor sink.
  3. Take this opportunity to clean the floor sink thoroughly with a brush and mild detergent. This will ensure a clean surface for the new grate to be installed.

Proper Placement Of New Floor Sink Grate

With the existing grate removed and the floor sink cleaned, it’s time to place the new floor sink grate. Follow these steps:

  1. Position the new grate over the floor sink, ensuring it aligns properly with the opening.
  2. Check for any obstructions or misalignments.
  3. If necessary, make adjustments to the position of the grate until it fits securely and snugly.

Secure Installation For Stability

To ensure the floor sink grate stays in place and provides stability, follow these installation steps:

  1. Secure the new grate to the floor sink using the appropriate fasteners. This may include screws or bolts, depending on the design of the grate.
  2. Tighten the fasteners until the new grate is securely attached to the floor sink, but be cautious not to overtighten and damage the grate or floor sink.
  3. Double-check the stability of the grate by applying gentle pressure in different areas. If it feels loose or unstable, adjust the fasteners accordingly.

By following these step-by-step instructions and taking the necessary precautions, you can easily install a new floor sink grate in your space. It’s important to ensure a proper and secure installation to maintain functionality and prevent any hazards or accidents. Now you’re ready to enjoy all the benefits a floor sink grate brings to your environment!

Factors To Consider When Choosing A Floor Sink Grate

When it comes to choosing a floor sink grate, there are several important factors that you need to consider. The right grate can ensure proper drainage, prevent clogs, and maintain a safe and clean environment. In this section, we will discuss the key factors to keep in mind when selecting a floor sink grate.

Size And Dimensions

One of the first factors to consider is the size and dimensions of the floor sink grate. The grate should be large enough to cover the entire opening of the sink while allowing water and debris to flow through easily. Measure the dimensions of your sink carefully to ensure a proper fit. A grate that is too small may lead to water overflow, while a grate that is too large may not sit securely in the sink.

Load-bearing Capacity

Another important factor to consider is the load-bearing capacity of the floor sink grate. The grate should be able to handle the weight of the objects or equipment that will be placed on it. Consider the maximum load that your sink is expected to endure and choose a grate that can bear that weight without bending or cracking. This ensures the longevity and durability of the grate.

Material Durability

The material from which the floor sink grate is made plays a vital role in its durability. Opt for a grate that is constructed from high-quality materials such as stainless steel, cast iron, or fiberglass. These materials are known for their strength and resistance to corrosion, ensuring that the grate will withstand heavy use and remain in good condition for a long time.

Anti-slip Features

Safety should always be a top consideration when choosing a floor sink grate. Look for a grate that has anti-slip features to prevent accidents in wet or slippery areas. Some grates come with built-in textures or coatings that offer enhanced traction, reducing the risk of slips and falls. Choosing a grate with anti-slip properties is especially important in environments where there is a high likelihood of water or other liquids accumulating.

Easy Cleaning And Maintenance

Lastly, consider the ease of cleaning and maintenance when selecting a floor sink grate. Over time, grates can become clogged with debris, grease, or other substances, which can affect the sink’s drainage. Look for a grate that is easy to clean and maintain, preferably one that can be easily removed for thorough cleaning. This will save you time and effort in the long run, ensuring that your sink remains functional and hygienic.

Frequently Asked Questions Of Floor Sink Grate


What Is A Floor Sink Grate?


A floor sink grate is a removable cover or grate that is placed over a floor sink to prevent debris, solid waste, and large objects from entering the drainage system. It helps to maintain the flow of wastewater and prevents clogs in the pipes.


Why Is A Floor Sink Grate Important?


A floor sink grate is important as it acts as a barrier to protect the drainage system from debris and solid waste. It helps to prevent clogs and blockages that can cause backups and overflow. Additionally, it ensures the smooth flow of wastewater, maintaining proper sanitation in commercial and industrial spaces.


How To Choose The Right Floor Sink Grate?


When choosing a floor sink grate, consider the material, size, and load-bearing capacity. Opt for rust-resistant materials like stainless steel or cast iron. Additionally, ensure the grate size is compatible with the floor sink opening. Consider the anticipated weight and type of traffic to select a grate that can efficiently handle the load.


How To Install A Floor Sink Grate?


To install a floor sink grate, remove the existing grate by loosening the screws or bolts. Thoroughly clean the sink and ensure it is free from debris. Place the new grate over the sink opening and align it properly. Secure the grate in place with screws or bolts, ensuring it sits flush with the floor surface.


Conclusion


To wrap up, a floor sink grate plays a crucial role in maintaining proper drainage and preventing clogs in commercial and industrial settings. With its sturdy construction and efficient design, it effectively filters out debris, ensuring the smooth flow of water.


By investing in a high-quality grate, businesses can ensure a clean and hygienic environment while prolonging the lifespan of their plumbing system. Don’t overlook the importance of this small yet essential component in maintaining a functional and safe workspace.

Butterfly Shower Curtain: Transform Your Bathroom with Nature-Inspired Elegance

Butterfly Shower Curtain: Transform Your Bathroom with Nature-Inspired Elegance

The Butterfly Shower Curtain is available in various colors and designs, ranging from rustic and bohemian styles to floral and colorful patterns. With options like fabric or PEVA material, these curtains are perfect for adding a touch of nature and whimsy to any bathroom decor.


Whether you prefer a vintage farmhouse look or a more modern and vibrant design, there are plenty of options to choose from. You can find these curtains at popular retailers like Amazon, Target, Bed Bath & Beyond, and more. Bring a touch of nature indoors with the beautiful Butterfly Shower Curtain.


5. Butterfly-inspired Shower Curtains For Kids’ Bathrooms

Engaging and playful designs for children

If you’re looking to spruce up your kids’ bathroom, a butterfly-inspired shower curtain is the perfect choice. With their vibrant colors and whimsical patterns, these curtains are sure to capture your child’s imagination and transform their bathroom into a fun and inviting space. From adorable cartoon butterflies to life-like illustrations, these designs will bring joy and delight to your little one every time they step into the bathroom.

The educational value of butterfly-themed bathroom accessories

Butterflies are not only beautiful creatures but they also offer a great opportunity for learning. By incorporating butterfly-themed bathroom accessories like shower curtains, you can introduce your child to the fascinating world of nature. These accessories provide a visual representation of different butterfly species, allowing your child to learn about their colors, shapes, and patterns. It’s a subtle way to teach your child about the diversity of life and instill a love for the natural world.

Ensuring each H3 heading adheres to HTML syntax

7. Cleaning And Maintaining Your Butterfly Shower Curtain

Once you have adorned your bathroom with a beautiful butterfly-themed shower curtain, it’s important to ensure its longevity and keep it looking fresh. Proper cleaning and maintenance will not only keep your curtain hygienic but also preserve the vibrant colors and intricate details of the butterfly design. Follow these tips to extend the lifespan of your butterfly shower curtain.

Tips For Proper Cleaning And Maintenance

  1. Regularly shake off excess water: After each use, gently shake the curtain to remove any excess water droplets. This will prevent water stains and help the curtain dry faster.
  2. Machine wash with care: When it’s time to give your butterfly shower curtain a thorough clean, check the care instructions recommended by the manufacturer. Most fabric curtains can be machine washed on a gentle cycle with mild detergent. For plastic or vinyl curtains, wipe them down with a damp cloth or sponge.
  3. Avoid harsh chemicals: To maintain the vibrant colors and intricate details of your butterfly design, avoid using harsh chemical cleaners or bleach. These can cause the colors to fade and damage the fabric or material.
  4. Air dry: After washing, hang the curtain to air dry instead of using a dryer. Excessive heat can shrink or warp the fabric, so it’s best to allow it to dry naturally.
  5. Remove soap residue: Soap scum can accumulate on your shower curtain over time. To remove any residue, mix equal parts water and white vinegar in a spray bottle. Spray the solution on the curtain and wipe it clean with a cloth or sponge.
  6. Prevent mold and mildew: To prevent the growth of mold and mildew, make sure the bathroom is well-ventilated. Use a squeegee or towel to wipe off excess water from the curtain after each use. Additionally, you can periodically spray the curtain with a mixture of water and tea tree oil, known for its natural antifungal properties.
  7. Store properly: If you’re temporarily removing the butterfly shower curtain, store it in a dry and well-ventilated area. Avoid folding it in tight creases, as this can lead to permanent wrinkles. Instead, loosely roll it up or hang it on a padded hanger.

By following these cleaning and maintenance tips, you can ensure that your butterfly-themed shower curtain remains fresh, vibrant, and beautiful for years to come. Remember, taking care of your shower curtain is not only hygienic but also adds to the overall aesthetic of your bathroom.

4. Creating A Relaxing Oasis With Butterfly Shower Curtains

The Calming Effect Of Butterfly Imagery

When it comes to creating a relaxing oasis in your bathroom, incorporating butterfly imagery can have a transformative effect. The delicate and graceful nature of butterflies instantly brings a sense of calm and tranquility to any space. By choosing a butterfly shower curtain, you can infuse your bathroom with this soothing energy and create a serene atmosphere.

Incorporating Tranquility Through Soothing Colors And Motifs

One of the key aspects of creating a relaxing oasis with butterfly shower curtains is through the use of soothing colors and motifs. Soft pastel shades like pale greens, blues, and pinks can evoke a sense of tranquility and relaxation. Additionally, incorporating floral motifs alongside the butterflies can further enhance the calming effect, bringing a touch of nature into your bathroom.

To ensure a cohesive and harmonious look, consider matching the colors in the butterfly shower curtain with the rest of your bathroom decor. This can be done through the use of towels, rugs, and other accessories in complementary colors. By creating a cohesive color scheme, you can maximize the overall calming effect of the butterfly shower curtain.

Ensuring Each H3 Heading Adheres To Html Syntax

Creating a relaxing oasis with butterfly shower curtains

The calming effect of butterfly imagery


When it comes to creating a relaxing oasis in your bathroom, incorporating butterfly imagery can have a transformative effect. The delicate and graceful nature of butterflies instantly brings a sense of calm and tranquility to any space. By choosing a butterfly shower curtain, you can infuse your bathroom with this soothing energy and create a serene atmosphere.


Incorporating tranquility through soothing colors and motifs


One of the key aspects of creating a relaxing oasis with butterfly shower curtains is through the use of soothing colors and motifs. Soft pastel shades like pale greens, blues, and pinks can evoke a sense of tranquility and relaxation. Additionally, incorporating floral motifs alongside the butterflies can further enhance the calming effect, bringing a touch of nature into your bathroom.


To ensure a cohesive and harmonious look, consider matching the colors in the butterfly shower curtain with the rest of your bathroom decor. This can be done through the use of towels, rugs, and other accessories in complementary colors. By creating a cohesive color scheme, you can maximize the overall calming effect of the butterfly shower curtain.


3. Enhancing Your Bathroom Décor With Vibrant Butterfly Prints

Exploring Colorful Patterns And Designs

When it comes to bathroom décor, finding the perfect balance between style and functionality is essential. If you’re looking to bring a burst of life and vibrance into your bathroom space, a butterfly shower curtain might be just what you need. With their colorful patterns and intricate designs, these curtains are a popular choice for those who want to add a touch of whimsy and beauty to their bathroom.

Butterfly shower curtains come in a wide range of styles and designs. From bold and vibrant colors to delicate pastel hues, there is a butterfly print to suit every taste and preference. Whether you prefer a modern and contemporary look or a more traditional and vintage feel, there is a butterfly shower curtain out there for you.

One of the advantages of choosing a butterfly shower curtain is the variety of patterns and designs available. You can find curtains with realistic butterfly prints, abstract designs, or even artistic interpretations. This allows you to choose a curtain that matches your personality and complements the existing décor of your bathroom.

How Butterfly Prints Transform Your Bathroom’s Ambiance

Butterfly prints have the power to transform your bathroom’s ambiance. By adding a burst of color and nature-inspired beauty, these prints create an instant focal point in the space. The vibrant colors and intricate details of butterfly prints can bring life and energy to even the dullest of bathrooms.

Butterfly shower curtains can also help create a relaxing and tranquil atmosphere in your bathroom. The delicate and graceful nature of butterflies symbolizes peace and freedom, which can set a calming tone in the space. Additionally, the natural imagery of butterflies adds a touch of nature to your bathroom, creating a soothing environment.

Another benefit of butterfly prints is their ability to make your bathroom feel more spacious and open. The intricate and detailed designs of butterflies draw the eye, creating a sense of depth and dimension in the space. This can be particularly beneficial for smaller bathrooms, as it visually expands the area.

In conclusion, the addition of a vibrant butterfly shower curtain can enhance your bathroom décor in numerous ways. From exploring colorful patterns and designs to transforming your bathroom’s ambiance, these prints bring a sense of beauty and tranquility to your space. So why not embrace the elegance and charm of butterfly prints and elevate your bathroom to a whole new level?

2. Choosing The Perfect Butterfly Shower Curtain For Your Bathroom

When it comes to adding a touch of elegance and nature-inspired beauty to your bathroom decor, a butterfly shower curtain is the perfect choice. Not only does it create a visually appealing focal point, but it also adds a sense of tranquility and serenity to your bathing experience. In this section, we will explore different design options and variations of butterfly shower curtains, as well as the key factors to consider when selecting one for your bathroom.

Understanding Different Design Options And Variations

Butterfly shower curtains come in a wide variety of designs, each offering its own unique style and aesthetic. Here are some popular design options and variations to consider:

  • Realistic butterfly prints: These shower curtains feature lifelike, detailed prints of butterflies, creating a stunning visual effect in your bathroom. Choose from a range of colors, sizes, and species to find the perfect match for your bathroom decor.
  • Abstract butterfly patterns: If you prefer a more contemporary and artistic look, opt for shower curtains with abstract butterfly patterns. These designs often feature bold colors, geometric shapes, and creative interpretations of butterflies.
  • Mixed with floral elements: For a nature-inspired theme, consider a butterfly shower curtain that incorporates floral elements. These curtains combine the beauty of butterflies with the elegance of flowers, resulting in a charming and harmonious design.
  • Watercolor butterflies: Watercolor prints have a soft and dreamy quality that adds a touch of romance to any bathroom. Choose a shower curtain with watercolor butterfly designs for a delicate and ethereal ambiance.

Factors To Consider When Selecting A Butterfly Shower Curtain

When choosing the perfect butterfly shower curtain for your bathroom, it’s important to consider the following factors:

  • Size: Measure your shower area and choose a curtain that fits perfectly. Ensure that the curtain is wide and long enough to provide adequate coverage and prevent water from splashing onto your bathroom floor.
  • Material: Look for a shower curtain made from high-quality, waterproof fabric that is durable and easy to clean. Polyester or nylon fabrics are popular choices for their resistance to mold and mildew.
  • Color scheme: Consider the existing color scheme of your bathroom and choose a curtain that complements it. Whether you prefer vibrant and bold shades or soft and muted tones, select a color palette that enhances the overall aesthetic of your space.
  • Hardware and hooks: Don’t forget to consider the hardware and hooks needed to hang the shower curtain. Opt for sturdy and rust-resistant hooks that will securely hold the curtain in place.
  • Privacy: If privacy is a concern, choose a curtain with a liner or a double-layered design that prevents see-through. This ensures that you can enjoy your shower in complete privacy.

By considering these design options and factors when selecting a butterfly shower curtain, you can transform your bathroom into a serene and enchanting space. So, let your imagination take flight and find the perfect butterfly shower curtain that reflects your personal style and enhances your bathing experience.

1. Embrace Nature’s Beauty With A Butterfly-inspired Shower Curtain

When it comes to creating a tranquil and inviting bathroom space, nothing can compare to the beauty of nature-inspired decor. One of the most enchanting and popular choices for a bathroom transformation is a butterfly-themed shower curtain. With its vibrant colors, delicate patterns, and symbolic meaning, a butterfly shower curtain brings a touch of whimsy and elegance to any bathroom.

The Allure Of Butterfly-themed Bathroom Accessories

Butterflies have long been associated with beauty, transformation, and freedom. Their delicate wings and graceful flight capture the imagination and evoke a sense of wonder. Incorporating butterfly-themed bathroom accessories, such as a shower curtain, not only adds visual appeal but also creates a soothing and serene ambiance.

A butterfly shower curtain can instantly transform your bathroom into a serene retreat, where you can relax and unwind after a long day. The intricate patterns and vibrant colors of butterflies bring a touch of nature indoors, creating a refreshing atmosphere that rejuvenates the senses.

Moreover, the allure of butterfly-themed bathroom accessories extends beyond their visual appeal. The butterfly symbolizes change and growth, reminding us to embrace transformation and find joy in the journey. By incorporating butterfly decor into your bathroom, you can infuse your space with positive energy and a reminder to embrace life’s beautiful moments.

Why A Butterfly Shower Curtain Is A Perfect Choice

There are several reasons why a butterfly shower curtain is the perfect choice when it comes to revamping your bathroom decor.

  1. Elevated Aesthetics: A butterfly shower curtain adds a touch of elegance and sophistication to your bathroom. The intricate butterfly patterns and subtle color gradients elevate the aesthetics of the space, creating a visually stunning focal point.
  2. Easy to Coordinate: Butterfly-themed decor is versatile and easy to match with existing bathroom accessories. Whether your bathroom has a modern, minimalist, or vintage look, a butterfly shower curtain seamlessly integrates into any style, adding a pop of color and charm.
  3. Nature-Inspired Tranquility: With its connection to nature, a butterfly shower curtain brings a sense of tranquility to your bathroom. The calming colors and imagery evoke a peaceful ambiance, making your bathroom a serene oasis where you can relax and unwind.
  4. Suitable for All Ages: Butterfly-themed decor appeals to people of all ages. Whether you are designing a bathroom for a child, teenager, or adult, a butterfly shower curtain adds a touch of whimsy and charm that is universally loved.

In conclusion, a butterfly-in

6. Combining Style And Functionality: Waterproof Butterfly Shower Curtains

When it comes to designing and decorating your bathroom, it’s important to not only focus on style but also on functionality. A waterproof butterfly shower curtain is the perfect addition to any bathroom, as it combines both style and practicality.

The Importance Of A Waterproof Shower Curtain

A waterproof shower curtain plays a crucial role in keeping your bathroom clean and dry. It serves as a barrier, preventing water from splashing onto your floors and walls, which can cause damage over time. By investing in a waterproof shower curtain, you can save yourself the hassle of constantly mopping up puddles or dealing with mold and mildew issues.

Not only does a waterproof shower curtain protect your bathroom from water damage, but it also adds a touch of style to your space. With a wide range of designs and patterns available, you can find a butterfly shower curtain that complements your bathroom décor and reflects your personal style.

Nowadays, manufacturers offer waterproof shower curtains made from high-quality materials that are durable and easy to clean. These curtains are designed to withstand daily use and resist the growth of mold and mildew. They are also equipped with features such as reinforced grommets and weighted hems to ensure they stay in place while you shower.

Maintaining A Stylish And Practical Bathroom With A Waterproof Butterfly Shower Curtain

When it comes to maintaining a stylish and practical bathroom, a waterproof butterfly shower curtain is a must-have accessory. Here are some tips on how to make the most of this functional and decorative piece:

  1. Choose a design that complements your existing bathroom décor. Whether you prefer a minimalist look or a more vibrant and colorful aesthetic, there is a butterfly shower curtain to suit your style.
  2. Opt for a curtain that is easy to clean. Look for one that is machine washable or can be easily wiped clean. This will ensure that your shower curtain stays fresh and free from any buildup.
  3. Consider the length and width of the curtain. Make sure it is the right size for your shower or bathtub to ensure maximum coverage and protection against water splashes.
  4. Invest in curtain liners for added protection. While waterproof shower curtains are designed to repel water, using a liner can provide an extra layer of defense against moisture and help prolong the lifespan of your curtain.
  5. Regularly inspect and clean your curtain to prevent the buildup of soap scum or mildew. This will not only keep your curtain looking fresh but also maintain its functionality.
  6. Don’t shy away from experimenting with different butterfly shower curtain designs. With a variety of colors and patterns available, you can easily switch up the look of your bathroom and add a touch of whimsy.

A waterproof butterfly shower curtain not only protects your bathroom from water damage but also adds a stylish and decorative element to your space. By choosing a high-quality and easy-to-maintain curtain, you can ensure that your bathroom remains both functional and visually appealing.

Butterfly Shower Curtain: Transform Your Bathroom with Nature-Inspired Elegance


Credit: royale-one.com


8. Affordable Ways To Decorate Your Bathroom With A Butterfly Shower Curtain

Adding a butterfly shower curtain to your bathroom can instantly transform the space into a whimsical and nature-inspired retreat. Not only does it add a touch of charm and elegance, but it also allows you to incorporate budget-friendly decor options. In this section, we will explore some affordable ways to accessorize your bathroom with a butterfly shower curtain, including budget-friendly ideas, DIY projects, and creative options for a personalized touch.

Budget-friendly Ideas To Accessorize Your Bathroom

When it comes to decorating on a budget, there are several wallet-friendly options to enhance your bathroom’s aesthetic. Here are some ideas:

  1. Choose complementary colors: Inexpensive accessories like bath mats, towels, and soap dispensers in coordinating colors can tie the whole look together without breaking the bank.
  2. Add wall art: Hang affordable butterfly-themed wall art or prints to create a cohesive and stylish look on a budget.
  3. Invest in storage solutions: Utilize inexpensive storage baskets or shelves with butterfly motifs to organize bathroom essentials and add a decorative touch at the same time.
  4. Refresh with greenery: Incorporate low-maintenance indoor plants like small potted ferns or succulents to bring a touch of nature into your bathroom.
  5. Coordinate curtains and accessories: Choose budget-friendly shower curtain hooks, soap dishes, and toothbrush holders that match the butterfly shower curtain, creating a cohesive and polished look.

Diy Projects And Creative Options For A Personalized Touch

For those who love a touch of personalization, DIY projects and creative options can elevate the look of your bathroom. Here are some ideas:

  • Create butterfly-themed artwork: Paint or draw your own butterfly-inspired artwork and frame it to hang on the bathroom walls.
  • Customize with butterfly decals: Apply butterfly decals or stickers to the walls or even the shower curtain itself to add a personalized touch.
  • Make a butterfly mobile: Craft a DIY butterfly mobile using colorful paper or fabric butterflies suspended from a hoop or branch to add movement and visual interest to your bathroom.
  • Add butterfly accents: Incorporate butterfly-shaped hooks, drawer pulls, or knobs for a unique and personalized touch.
  • DIY towel embellishments: Sew or glue butterfly appliques onto plain white towels to add a pop of color and whimsy.

With these budget-friendly ideas and creative options, you can easily decorate your bathroom with a butterfly shower curtain without breaking the bank. Embrace your inner DIY enthusiast or seek out affordable accessories to make your bathroom a beautiful and serene space to enjoy.

Frequently Asked Questions On Butterfly Shower Curtain


What Shower Curtains Prevent Mold?


Shower curtains that are made of fabric and can be machine washed are effective in preventing mold. Look for curtains with colorful designs like butterflies and wildflowers that are available on websites like Amazon and Target.


What’s The Best Shower Curtain For A Walk-in Shower?


The best shower curtain for a walk-in shower is the Butterfly Shower Curtain. It is available on different websites like Amazon, Target, and Bed Bath & Beyond. The curtain comes in various fabrics and sizes for your preference, providing a stylish and functional addition to your walk-in shower.


How Do I Keep My Shower Curtain From Blowing Into The Shower?


To keep your shower curtain from blowing into the shower, consider using heavy-duty curtain weights or magnets at the bottom of the curtain. You can also invest in a curved shower rod to create more space between the curtain and shower.


Is There A Special Shower Curtain For A Walk-in Shower?


Yes, there are special shower curtains available for walk-in showers. These curtains are designed to fit the specific dimensions of walk-in showers and come in various fabrics and styles. You can find them at online retailers like Amazon, Target, and Pottery Barn.


Conclusion


Incorporating a butterfly shower curtain into your bathroom decor can instantly add a touch of nature and beauty to your space. Whether you prefer a vibrant and colorful design or a more subtle and elegant one, there are plenty of options available to suit your style.


With a quick search, you can find a variety of butterfly shower curtains at affordable prices and in different sizes to fit your needs. Start transforming your bathroom into a serene and delightful oasis with a butterfly shower curtain today.