Best Vacuum For Stairs 2023

Best Vacuum For Stairs 2023 – Finding the Perfect Cleaning Companion

The best vacuum for stairs is the Shark Navigator Lift-Away ADV Upright Vacuum. It offers great performance and versatility, making it perfect for cleaning stairs.


Another excellent option is the Bissell PowerForce Helix Vacuum, which provides great value for money. These vacuums are highly recommended for effectively cleaning stairs. When it comes to cleaning stairs, finding the right vacuum is crucial. Regular vacuum cleaners may not be suitable for this task due to their bulkiness and lack of maneuverability.


Therefore, it’s essential to invest in a vacuum specifically designed for stairs. We will explore the best vacuums for stairs that are available in the market. Whether you need a handheld vacuum or an upright vacuum, we have got you covered. We will also highlight the key features and customer reviews to help you make an informed decision. So, let’s dive in and find the best vacuum for your stairs.


Importance Of Choosing The Right Vacuum For Stairs

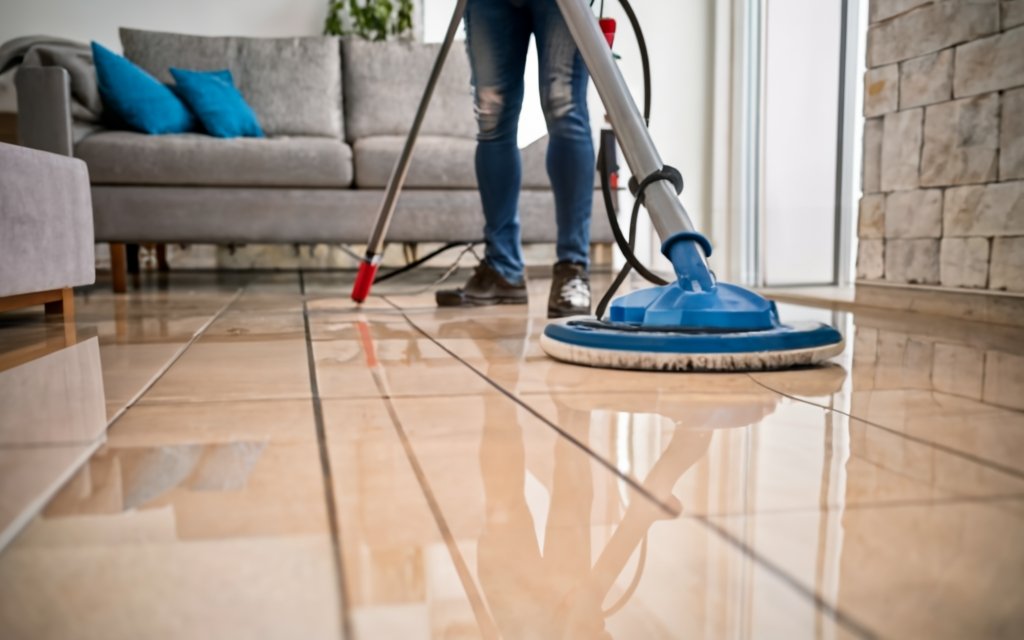
Vacuuming stairs can be a challenging task, as they are often harder to clean than other areas of the home. It requires a specialized tool that is designed to effectively remove dirt, dust, and debris from each step safely and efficiently. Choosing the right vacuum for stairs is crucial for maintaining a clean and healthy living environment, as well as ensuring your safety while cleaning. In this article, we will explore the importance of selecting the right vacuum for stairs, highlighting safety and efficiency considerations, as well as factors to keep in mind when making your choice.

Safety And Efficiency Considerations

When it comes to vacuuming stairs, safety should be a top priority. Traditional full-size upright vacuums can be bulky and difficult to maneuver, increasing the risk of accidents and potential injuries. Using the wrong vacuum can also result in inefficient cleaning, leaving behind dirt and debris that can accumulate over time and compromise the cleanliness of your stairs.

Factors To Keep In Mind

There are several factors to consider when choosing the right vacuum for stairs:

  1. Size and Weight: Opt for a lightweight and compact vacuum that is easy to carry and maneuver on each step.
  2. Attachments: Look for a vacuum that comes with specialized stair cleaning attachments, such as a crevice tool or a powered brush roll, to effectively remove dirt and debris from hard-to-reach areas.
  3. Suction Power: Ensure that the vacuum has sufficient suction power to effectively clean and remove dirt and debris from your stairs.
  4. Filter System: Consider a vacuum with a high-quality filter system to trap allergens and prevent them from being released back into the air.
  5. Cord Length or Battery Life: Evaluate the cord length or battery life of the vacuum to ensure it provides enough coverage for cleaning your entire staircase without the need for frequent unplugging or recharging.

By thoroughly considering these factors when choosing the right vacuum for your stairs, you can ensure efficient and safe cleaning, while also prolonging the lifespan of your vacuum by using it for its intended purpose.

Ultimately, selecting the right vacuum for stairs is essential for maintaining a clean and healthy living space, as well as ensuring your safety during the cleaning process. By understanding the safety and efficiency considerations and keeping key factors in mind, you can make a well-informed choice that meets your specific needs and keeps your stairs looking their best.

Factors To Consider When Buying A Vacuum For Stairs

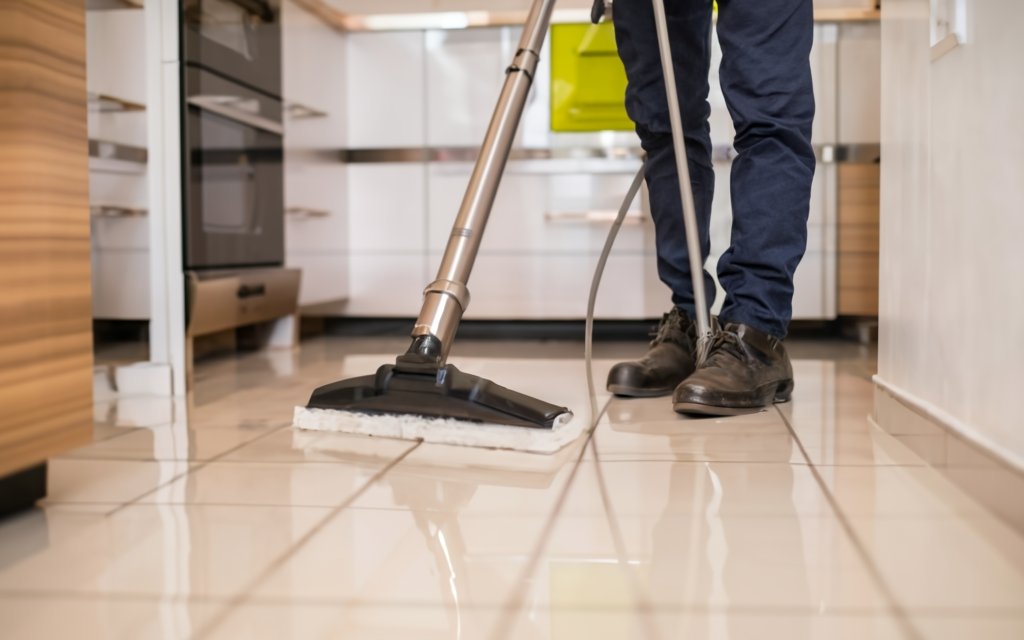
When it comes to cleaning stairs, a regular vacuum cleaner might not be the most efficient choice. Stairs require a specialized vacuum that can easily maneuver and reach different angles and corners. So, before you make a purchase, consider these essential factors to ensure you get the best vacuum for stairs.

Size And Weight

The size and weight of the vacuum cleaner play a crucial role when it comes to cleaning stairs. Since stairs can be narrow and challenging to navigate, you need a vacuum that is lightweight and compact. Look for a vacuum that is portable and easy to lift, allowing you to effortlessly carry it up and down the stairs.

Suction Power

The suction power of the vacuum is another critical factor to consider. Stairs often accumulate dust, dirt, and pet hair, so you need a vacuum with strong suction to thoroughly clean these surfaces. Opt for a vacuum that offers powerful suction to effectively remove debris from each step and ensure a deep clean.

Attachments And Accessories

In order to clean stairs efficiently, the vacuum should come with attachments and accessories specifically designed for this task. Look for a vacuum that includes a stair brush attachment, crevice tool, or upholstery tool. These attachments will help you clean the corners, edges, and hard-to-reach areas of the stairs effectively.

Cord Length And Maneuverability

The cord length and maneuverability of the vacuum are also essential considerations. Make sure the vacuum has a long enough cord that allows you to move freely without constantly unplugging and searching for a new outlet. Additionally, consider a vacuum with a swivel head that can easily maneuver around corners and tight spaces.

By considering these factors – size and weight, suction power, attachments and accessories, cord length, and maneuverability – you can find the perfect vacuum for stairs that will make your cleaning routine hassle-free and deliver outstanding results.

Top Features To Look For In A Vacuum For Stairs

When it comes to keeping your stairs clean and dust-free, having a vacuum specifically designed for this task can make all the difference. With the right features, you can ensure a deep clean while also making the process effortless and efficient. Whether you have carpeted stairs or hardwood steps, here are some essential features to look for when choosing the best vacuum for stairs.

Powerful Suction For Deep Cleaning

A vacuum with powerful suction is crucial when it comes to deep cleaning your stairs. Look for a model that has strong suction capabilities to effectively remove dirt, dust, and debris from your stairs, leaving them spotless and fresh. This ensures that even the most stubborn dirt particles are picked up, giving your stairs a truly deep clean.

Lightweight And Compact Design

When maneuvering around stairs, a lightweight and compact vacuum is essential. Bulky and heavy vacuums can be challenging to carry up and down the stairs, making the cleaning process cumbersome and tiring. Opt for a vacuum that is lightweight and compact, allowing for easy handling and maneuverability. This will enable you to effortlessly navigate your way through each step, ensuring every nook and cranny is thoroughly cleaned.

Portable And Easy To Maneuver

Portability is another important factor to consider when choosing a vacuum for stairs. Look for a vacuum that is easy to carry and maneuver. Features like a comfortable handle and a swivel head will make it easier to navigate the vacuum around your stairs without straining your wrists or arms. This ensures a hassle-free cleaning experience, allowing you to clean your stairs with ease and precision.

Versatile Attachments For Different Surfaces

Stairs can have different surfaces, such as carpet or hardwood, and each requires specific cleaning methods. To ensure efficient cleaning, opt for a vacuum that comes with versatile attachments designed for different surfaces. Attachments like a crevice tool, upholstery brush, and motorized brushroll for carpets will allow you to tackle different areas and surfaces effectively, ensuring a thorough and customized cleaning experience.

Long Cord Or Cordless Options

Having a vacuum with a long cord or a cordless option is essential when cleaning stairs. A long cord eliminates the need for frequent unplugging and re-plugging as you move up and down the stairs, providing uninterrupted cleaning. On the other hand, a cordless vacuum offers ultimate freedom of movement and eliminates the hassle of dealing with cords altogether. Consider your preferences and choose a vacuum with a long cord or a cordless option to make your stair cleaning experience seamless and efficient.

Reviews Of The Best Vacuums For Stairs

When it comes to keeping your stairs clean and free of dirt and debris, having the right vacuum can make all the difference. In this section, we will review some of the best vacuums specifically designed for cleaning stairs.

Dyson V8 Absolute

The Dyson V8 Absolute is a top-rated vacuum known for its powerful suction and versatility. With its cordless design, you can easily maneuver it up and down the stairs without being limited by cords. The V8 Absolute also comes with a variety of attachments that make cleaning stairs a breeze. Whether you need to tackle pet hair, dust, or small debris, this vacuum has you covered.

Shark Navigator Lift-away Professional Nv356e

If you’re looking for a vacuum that is both efficient and affordable, the Shark Navigator Lift-Away Professional NV356E is a great option. It features a lift-away canister that allows you to clean stairs with ease. With its advanced swivel steering and powerful suction, this vacuum enables you to reach every nook and cranny of your stairs. It also comes with a wide range of accessories, including a pet power brush for tackling stubborn pet hair.

Bissell Cleanview Swivel Rewind Pet Upright Bagless Vacuum Cleaner

The Bissell Cleanview Swivel Rewind Pet Upright Bagless Vacuum Cleaner is specifically designed for pet owners who need to tackle pet hair on their stairs. It comes with specialized pet tools, including a pet hair corner tool and a pet turbo eraser tool, making it easy to remove pet hair and dander from your stairs. With its powerful suction and swivel steering, this vacuum is not only great for stairs but also for cleaning other areas of your home.

Hoover Linx Cordless Stick Vacuum Cleaner

If you prefer a cordless and lightweight option, the Hoover Linx Cordless Stick Vacuum Cleaner is worth considering. With its slim design and powerful suction, it can easily reach and clean stairs without any hassle. The vacuum also features an interchangeable battery, allowing you to extend your cleaning time. Its bristle brush helps effectively remove dirt and debris from carpeted stairs, ensuring a thorough and efficient clean.

No matter which vacuum you choose from this list, you can rest assured that it will effectively clean your stairs and make the task much easier. Don’t let dirty stairs be a source of frustration – invest in a high-quality vacuum and enjoy a clean and fresh staircase.

Pros And Cons Of Different Vacuum Types For Stairs

When it comes to cleaning stairs, having the right vacuum can make all the difference. But with so many options available, it can be overwhelming to choose the best one for your needs. In this article, we’ll discuss the pros and cons of different vacuum types for stairs: upright vacuums, canister vacuums, stick vacuums, and handheld vacuums. Each type has its own unique features that may suit your specific requirements, so let’s dive in and find the perfect vacuum for your stairs.

Upright Vacuums

Upright vacuums are a popular choice for many homeowners due to their powerful suction and ease of use. These vacuums usually come with various attachments and accessories, making them versatile for cleaning different surfaces. When it comes to stairs, upright vacuums can be a bit bulky and heavy, making it challenging to carry and maneuver them. However, many newer models come with features like detachable canisters or lift-away options, allowing you to easily clean stairs without straining your back. Overall, upright vacuums are great for deep cleaning carpets on stairs but may require a bit more effort in terms of maneuverability.

Canister Vacuums

Canister vacuums are known for their compact and lightweight design, making them excellent for cleaning stairs. These vacuums consist of a separate canister and a long hose, which offers excellent flexibility and reachability when cleaning hard-to-reach areas. Canister vacuums often come with various attachments that are specifically designed for stairs, such as brush heads and crevice tools. This makes them ideal for effectively cleaning both carpeted and hardwood stairs. However, some drawbacks of canister vacuums include limited suction power compared to upright vacuums, the need to drag the canister behind, and potential difficulty in storing due to their larger size.

Stick Vacuums

Stick vacuums are lightweight and slim, making them easy to maneuver on stairs. They are generally cordless, which offers excellent portability and convenience in navigating around tight spaces. Stick vacuums work best on hard floors and low-pile carpets, so they may not be as effective on thick carpets or deep-pile rugs. These vacuums usually come with attachments like brush heads and crevice tools, allowing you to clean stairs more efficiently. However, stick vacuums often have smaller dust bins, so frequent emptying may be required for larger cleaning tasks. Additionally, the battery life of cordless stick vacuums can be a limiting factor, especially when cleaning a larger set of stairs.

Handheld Vacuums

Handheld vacuums are compact, lightweight, and specifically designed for quick spot cleaning. They are perfect for tackling small messes, pet hair, and crumbs on stairs. Handheld vacuums are easy to carry and maneuver, making them great for cleaning tight corners and narrow spaces. They often come with attachments like brush heads and crevice tools, allowing you to clean stairs thoroughly. However, handheld vacuums have limited suction power compared to larger vacuum types, which means they may take more time and effort to clean larger areas. They also have smaller dust bins, requiring frequent emptying, especially when dealing with extensive staircases.

To summarize, each vacuum type has its own set of pros and cons when it comes to cleaning stairs. Upright vacuums offer powerful suction but may be bulkier to carry. Canister vacuums are compact and versatile but may lack the same level of suction power. Stick vacuums are lightweight and portable but may not be as effective on thicker carpets. Handheld vacuums are convenient for quick spot cleaning but may require more time for larger areas. Consider your specific needs and preferences to choose the best vacuum type for keeping your stairs clean and dirt-free.

Tips For Cleaning Stairs Effectively

Cleaning stairs can be a challenging task, especially when it comes to removing dirt, dust, and debris from hard-to-reach areas. However, with the right techniques and tools, you can keep your stairs spotless and hygienic. Here are some effective tips for cleaning stairs:

Proper Technique For Vacuuming Stairs

Vacuuming stairs requires a different technique than cleaning other surfaces. Follow these steps to ensure a thorough clean:

  1. Start from the top step and work your way downwards. This prevents dirt from falling onto already cleaned areas.
  2. Use a lightweight and maneuverable vacuum cleaner that is specifically designed for stairs. This makes it easier to carry and navigate on each step.
  3. Hold the vacuum securely and use short, overlapping strokes to cover the entire surface of each step. This ensures that no dirt or debris is left behind.
  4. Pay extra attention to the edges and corners of the steps, as these areas tend to accumulate more dirt and dust.
  5. If your vacuum cleaner has a brush attachment, use it to agitate the carpet fibers and dislodge any embedded dirt.

Using Attachments For Hard-to-reach Areas

Stairs often have hard-to-reach areas, such as crevices between steps or tight corners. To effectively clean these areas, make use of the attachments that come with your vacuum cleaner:

Attachment Function
Crevice tool Use this attachment to reach narrow gaps between steps or along the edges.
Upholstery tool If your stairs have upholstered surfaces, use this tool to remove dirt and pet hair.
Extension wand If the height of your stairs exceeds the reach of your vacuum cleaner, attach the extension wand to clean higher steps.

By using these attachments, you can effectively clean every nook and cranny of your stairs, ensuring a thorough and hygienic result.

Remember to regularly empty the vacuum cleaner’s dustbin or change the bag to maintain optimal suction and prevent clogging.

With these tips and techniques, you can keep your stairs clean and free from dirt, allergens, and debris. Regularly vacuuming your stairs not only enhances the appearance of your home but also promotes a healthier living environment for you and your family.

Maintenance And Care Tips For Your Stair Vacuum

Proper maintenance and care are crucial to keep your stair vacuum working efficiently and prolong its lifespan. Regular cleaning and maintenance ensure that your vacuum is ready to tackle any stair cleaning task. In this section, we will discuss essential tips for maintaining and caring for your stair vacuum.

Cleaning The Filters And Brush Roll

The filters and brush roll are integral components of your stair vacuum that require regular cleaning. Over time, these parts can accumulate dirt, dust, and debris, hindering the vacuum’s performance. To ensure optimal suction power and efficient cleaning, follow these steps:

  1. Refer to your vacuum’s user manual to locate the filters and brush roll.
  2. Remove the filters and brush roll according to the manufacturer’s instructions.
  3. Clean the filters by tapping them gently to remove loose dirt and debris. Alternatively, you can rinse them with water, but make sure they are completely dry before reinserting them into the vacuum.
  4. Inspect the brush roll for any tangled hair or threads. Use scissors or a brush to carefully remove any obstructions.
  5. Reinstall the clean filters and brush roll back into the vacuum.

Emptying The Dust Canister Regularly

The dust canister in your stair vacuum collects dirt and debris during the cleaning process. It is vital to empty the canister regularly to maintain strong suction power and prevent clogs. Follow these steps to empty the dust canister:

  1. Locate the dust canister on your vacuum.
  2. Press the release button or remove any latches to detach the canister from the vacuum.
  3. Take the canister to a garbage bin or bag and empty its contents.
  4. Use a brush or cloth to clean any remaining debris from the canister.
  5. Reattach the empty dust canister back into the vacuum.

Checking For Clogs Or Blockages

Clogs or blockages can impede the airflow in your stair vacuum, reducing its effectiveness. Regularly checking for clogs and blockages can prevent potential damage and ensure optimal performance. Here’s how to check for and clear any clogs or blockages:

  1. Switch off and unplug your stair vacuum.
  2. Inspect the hose, attachments, and air pathways for any visible blockages.
  3. If you find a blockage, carefully remove it using a long, thin object like a straightened wire hanger or a pipe cleaner.
  4. Ensure that all air pathways are clear before using your vacuum again.

By following these maintenance and care tips, you can ensure that your stair vacuum remains in excellent working condition, providing efficient cleaning for your stairs. Remember to consult your vacuum’s user manual for specific maintenance instructions and recommended cleaning intervals.

Best Vacuum For Stairs 2023


Credit: www.popsci.com


Frequently Asked Questions Of Best Vacuum For Stairs


What Is The Best Vacuum To Vacuum Stairs?


The best vacuum for stairs is subjective and depends on your specific needs. However, some popular options are the Shark Navigator Lift-Away ADV Upright Vacuum and the Bissell PowerForce Helix Vacuum. These vacuums are highly rated and effective for cleaning stairs.


Additionally, handheld vacuums like the Bissell Pet Hair Eraser and the Powools Pet Hair Handheld Vacuum are also recommended for their convenience and portability.


What Is The Easiest Way To Vacuum Stairs?


The easiest way to vacuum stairs is to use a handheld vacuum or a vacuum with a detachable hose and brush attachment. Start from the top and work your way down, using short back-and-forth motions. Be sure to clean corners and edges thoroughly.


What Is The Best Shark Vacuum Cleaner For Stairs?


The best shark vacuum cleaner for stairs is the Shark Navigator Lift-Away ADV Upright Vacuum.


Which Dyson Is Best For Stairs And Pet Hair?


The best Dyson for stairs and pet hair is the Dyson V11 Animal.


Conclusion


Choosing the best vacuum for stairs can make the task of cleaning them much easier and more efficient. While there are several options available in the market, our top picks include the Shark Navigator Lift-Away ADV Upright Vacuum and the Bissell Pet Hair Eraser Lithium Ion Cordless Hand Vacuum.

These vacuums offer great performance, convenience, and value for money. So, say goodbye to the hassle of cleaning stairs and hello to a cleaner and healthier home!

Dyson V8 Absolute:

Pros:

  • Powerful Suction
  • Cordless Convenience
  • HEPA Filtration
  • Versatile Attachments

Cons:

  • Limited Battery Life
  • Higher Price

Shark Navigator Lift-Away Professional NV356E:

Pros:

  • Lift-Away Functionality
  • Anti-Allergen Complete Seal Technology
  • Large Dust Cup
  • Reasonably Priced

Cons:

  • Corded Design
  • Bulky and Heavy

Bissell Cleanview Swivel Rewind Pet Upright Bagless Vacuum Cleaner:

Pros:

  • Swivel Steering
  • Pet-Friendly Features
  • Automatic Cord Rewind
  • Affordable

Cons:

  • Not Suitable for Allergy Sufferers
  • Build Quality

Hoover Linx Cordless Stick Vacuum Cleaner:

Pros:

  • Cordless Convenience
  • Lightweight
  • Interchangeable Batteries
  • Reasonable Price

Cons:

  • Limited Battery Life
  • Basic Attachments
Minimalist Playroom

Minimalist Playroom: Simplify and Play

A minimalist playroom can be achieved by providing a neutral base through choosing neutral paint colors, furniture, storage, and rugs, allowing colorful books and toys to stand out. This creates a calm and relaxed space, promoting a sense of peace and simplicity.


When setting up a playroom in a limited space, alternative ideas include creating a designated play area in a corner of a living room or child’s bedroom, using storage bins or shelves to keep toys organized, and creating an outdoor play area in a backyard or balcony if available.


Additionally, regularly rotating toys and books in and out of the playroom is key to maintaining a minimalist look and feel.


The Benefits Of A Minimalist Playroom

A minimalist playroom can provide a space that promotes increased focus and creativity for children. With fewer distractions and clutter, kids can better engage in imaginative play, problem-solving, and concentration. A well-organized play space allows children to fully immerse themselves in their activities, leading to enhanced cognitive development and improved attention span.

A minimalist playroom helps to reduce clutter and stress for both children and parents. By intentionally choosing essential toys and organizing them in a minimalist manner, you can create a calming environment that is easier to clean and maintain. Minimalism encourages intentional play and eliminates the overwhelming feeling that can come from an abundance of toys. It also promotes responsibility and teaches kids the importance of taking care of their belongings.

Simplifying The Space

How do you set up a minimalist playroom?

By providing a neutral base, meaning choosing a neutral paint color, furniture, storage, and rugs. You are allowing space visually for colorful books and toys. The third reason is that by creating a neutral playroom you are creating a calm and relaxed space.

How do you make a playroom with no space?

  • Build A Rock Wall. If your little one loves to climb, try an at-home rock wall!
  • Compact Play Kitchen.
  • Create A Reading Loft.
  • Magnetic or Chalkboard Wall.
  • Add A Wall-Mounted Table.
  • Hang A Pod Swing.
  • Designated play corner: Create a designated play area in a corner of your living room or your child’s bedroom. Use storage bins or shelves to keep toys organized and easily accessible.
  • Outdoor play area: Create an outdoor play area in your backyard or on a balcony if you have one.

Having a dedicated playroom can be beneficial for organizing toys and providing a designated space for children to play. However, if you don’t have a playroom, there are alternative ways to create play areas within your home.

What is the minimum size for a playroom?

There is no specific minimum size for a playroom, as it can vary depending on the available space. However, it is important to ensure that the playroom is large enough to accommodate furniture, storage, and enough space for children to play comfortably.

Creating A Calm Atmosphere

In order to create a minimalist playroom with a calm atmosphere, it is important to utilize natural light and open spaces. This can be achieved by choosing a neutral paint color for the walls and opting for furniture and storage solutions that are light in color and have clean lines. By allowing natural light to enter the space, it creates a sense of openness and tranquility.

Incorporating elements such as plants and soft textures can also contribute to a calm atmosphere. Plants not only add a touch of nature but also help to improve air quality. Soft textures, such as rugs and cushions, create a cozy and inviting space for children to play in.

Implementing soundproofing techniques is another important aspect of creating a calm playroom. This can include using acoustical panels on the walls, placing rugs on the floor to absorb sound, and choosing furniture and toys that have noise-reducing properties.

Encouraging Independent Play


Encourage independent play in a minimalist playroom by providing a neutral base with furniture, storage, and rugs, allowing colorful books and toys to stand out. By creating a calm and relaxed space, children can explore and play freely.

How do you set up a minimalist playroom?
By providing a neutral base, meaning choosing a neutral paint color, furniture, storage, and rugs. You are allowing space visually for colorful books and toys. The third reason is that by creating a neutral playroom you are creating a calm and relaxed space.
How do you make a playroom with no space?
  • Build A Rock Wall. If your little one loves to climb, try an at-home rock wall!
  • Compact Play Kitchen.
  • Create A Reading Loft.
  • Magnetic or Chalkboard Wall.
  • Add A Wall-Mounted Table.
  • Hang A Pod Swing.
When you don’t have a playroom?
  • Designated play corner: Create a designated play area in a corner of your living room or your child’s bedroom. Use storage bins or shelves to keep toys organized and easily accessible.
  • Outdoor play area: Create an outdoor play area in your backyard or on a balcony if you have one.
Is a play room necessary?
No, a playroom is not necessary. You can create designated play areas within your home, such as a play corner or an outdoor play area. These spaces can be organized and designed to encourage independent play while keeping toys easily accessible.
What is the minimum size for a playroom?
The minimum size for a playroom depends on the available space. However, it is recommended to have enough space for children to move around comfortably and for storing toys and play equipment. Consider the needs of your child and the available space in your home when determining the size of your playroom.

Promoting Mindful Toy Selection


Build a minimalist playroom by choosing neutral colors for the walls, furniture, and storage to allow for visually vibrant toys and books. This creates a calm and relaxed space while maximizing playroom functionality. You can also create a designated play area in a corner of another room or create an outdoor play area if space is limited.

How do you set up a minimalist playroom?
By providing a neutral base, meaning choosing a neutral paint color, furniture, storage, and rugs. You are allowing space visually for colorful books and toys. The third reason is that by creating a neutral playroom you are creating a calm and relaxed space.
How do you make a playroom with no space?
1. Build A Rock Wall. If your little one loves to climb, try an at-home rock wall!
2. Compact Play Kitchen.
3. Create A Reading Loft.
4. Magnetic or Chalkboard Wall.
5. Add A Wall-Mounted Table.
6. Hang A Pod Swing.
When you don’t have a playroom?
– Designated play corner: Create a designated play area in a corner of your living room or your child’s bedroom. Use storage bins or shelves to keep toys organized and easily accessible.
– Outdoor play area: Create an outdoor play area in your backyard or on a balcony if you have one.
Is a playroom necessary?
A playroom is not necessary. You can create designated play areas within your home, such as a play corner in the living room or a backyard play area. It’s important to have a space for your child to play and be creative, but it doesn’t have to be a dedicated playroom.
What is the minimum size for a playroom?
There is no specific minimum size for a playroom. It will depend on the available space in your home and how you choose to use it. Whether it’s a small corner or a larger room, the key is to create a space that is safe, functional, and allows for play and creativity.

Designing A Functional Reading Nook

When designing a functional reading nook in a minimalist playroom, there are a few key elements to consider. First, creating a cozy and inviting space with comfortable seating is essential. This can be achieved through the use of soft cushions and plush chairs.

Second, organizing books in a visually appealing way adds to the atmosphere of the reading nook. Displaying books on open shelves or using bookends to create neat stacks can create an aesthetically pleasing look.

Lastly, incorporating a small table or desk for activities is important. This can serve as a space for coloring, drawing, or working on puzzles. It provides a surface for children to engage in other activities while still being in the reading nook.

Maintaining The Minimalist Playroom

Setting up a minimalist playroom involves several key considerations. First and foremost, opt for a neutral base to create a visually spacious environment. This includes choosing neutral paint colors, furniture, storage, and rugs. By doing so, you allow colorful books and toys to stand out and add a pop of vibrancy. Additionally, a neutral playroom promotes a sense of calm and relaxation, contributing to a peaceful atmosphere.

Involving children in the tidying process is crucial for maintaining a minimalist playroom. Teach them responsibility by assigning age-appropriate tasks and establishing a regular decluttering routine. This not only keeps the play area organized, but also instills valuable life skills in children.

Finding storage solutions that align with the minimalist aesthetic is another essential aspect. Look for sleek and functional storage options that can accommodate toys and other playroom essentials. This ensures a clutter-free environment and optimizes space utilization.

Minimalist Playroom: Simplify and Play


Credit: tinyhandstidyhome.com


Inspiring Creativity And Imagination

Setting up a minimalist playroom is all about inspiring creativity and imagination in children. One way to achieve this is by creating a designated art corner with limited supplies. By offering a few carefully selected art materials, such as crayons, markers, and paper, children are encouraged to use their imaginations and explore their interests.

Another important aspect of a minimalist playroom is encouraging open-ended play. This means providing toys and materials that can be used in multiple ways and leaving room for children to come up with their own ideas. By not overwhelming them with too many options, children are more likely to engage in imaginative play and develop their creativity.

Frequently Asked Questions For Minimalist Playroom


How Do You Set Up A Minimalist Playroom?


To set up a minimalist playroom, choose neutral colors for paint, furniture, and rugs. This creates a visually open space for colorful books and toys. Creating a calm and relaxed atmosphere is the third reason for a neutral playroom. Regularly rotate toys and books to maintain a minimalist look.


How Do You Make A Playroom With No Space?


To make a playroom with no space, follow these tips: provide a neutral base with neutral paint, furniture, storage, and rugs; build a rock wall, set up a compact play kitchen, create a reading loft, use a magnetic or chalkboard wall, add a wall-mounted table, and hang a pod swing.


Consider designated play corners or outdoor play areas as alternatives. Regularly rotate toys and books to maintain a minimalist look.


When You Don’t Have A Playroom?


To create a playroom when you don’t have one, you can set up a designated play area in a corner of your living room or child’s bedroom. Use storage bins or shelves to keep toys organized. If you have outdoor space, create an outdoor play area.


You can also rotate toys and books regularly to maintain a minimalist aesthetic.


What Is The Minimum Size For A Playroom?


A minimalist playroom should be spacious enough for kids to play comfortably. There is no specific minimum size, but it should have enough room for toys, furniture, and activities. Emphasize on creating a calm and relaxed space by choosing neutral colors and organizing toys and books effectively.


Regularly rotate toys and books to maintain a minimalist look.


Conclusion


Creating a minimalist playroom is a smart choice for parents who value simplicity and organization. By providing a neutral base and choosing furniture and storage that blends seamlessly into the space, you can create a visually pleasing environment that allows colorful books and toys to stand out.


Additionally, a neutral playroom promotes a sense of calm and relaxation, perfect for little ones to enjoy their playtime. Incorporating toy and book rotation is also essential to maintaining a minimalist look and feel. With a minimalist playroom, you can create a simple, playful space that encourages creativity and imagination.

How to Use a Tile Cleaning Machine

How to Use a Tile Cleaning Machine in 2023

A tile cleaning machine is one effective way to achieve a sparkling finish. Keeping your tiles clean and well maintained not only improve the esthetics of your space but also prolongs the lifespan of your tiles. In this complete guide, we will talk you through the step-by-step guideline of using a tile cleaning machine, understanding functionality & handling different types of tiles with troubleshooting common issues.

Understanding the Tile Cleaning Machine

Before diving into the cleaning process, it’s crucial to familiarize yourself with the tile cleaning machine itself. These machines are designed for remove dirt, grime, and stains from tiled surfaces. They typically use water, cleaning solution, and powerful brushes or scrubbers to dislodge and extract debris.

Preparing for Tile Cleaning

Before you begin using a tile cleaning machine, proper preparation is essential to ensure effective and safe cleaning.

Gathering the necessary equipment

Firstly, gather all the necessary equipment and materials for the cleaning process. This typically includes a tile cleaning machine, appropriate cleaning solution, scrub brushes or pads, a bucket, and safety gear such as gloves and goggles.

Preparing the tile surface

Next, prepare the tile surface by removing any loose debris. Sweep or vacuum the area to eliminate dust, dirt, and larger particles. This step helps prevent these particles from being pushed into the grout lines during cleaning, ensuring a more thorough clean.

Ensuring safety precautions

Before operating the tile cleaning machine, it’s crucial to prioritize safety. Wear protective clothing, such as gloves and goggles, to protect yourself from any possible leaks or contact with cleaning solutions. Additionally, read the machine’s user manual to understand specific safety instructions or precautions.


Operating the Tile Cleaning Machine

Operating the Tile Cleaning Machine

Once you’ve prepared the tile surface and taken the necessary safety precautions, it’s time to start operating the tile cleaning machine.

Familiarizing yourself with the controls and settings

Begin by familiarizing yourself with the controls and settings of the tile cleaning machine.For more details on how to use the specific gadget you’re using, read the user manual. Pay attention to water flow control, brush rotation speed, and pressure adjustment settings.

Adjusting the machine for different tile types

Different tile types may require specific machine settings adjustments to ensure optimum cleaning results. For example, ceramic tiles may require a gentler brush rotation speed compared to tougher porcelain tiles or natural stone tiles. Take note of the manufacturer’s recommendations for each tile type and adjust the machine accordingly.

Choosing the appropriate cleaning solution

Selecting the right cleaning solution is essential to remove dirt and stains from your tiles effectively. Check the manufacturer’s instructions for the tile cleaning machine to determine compatible cleaning solutions. Avoid using abrasive or acidic solutions as they may damage the tiles. Opt for mild, pH-neutral cleaners that are specifically formulated for tile cleaning.

Handling Different Types of Tiles

Handling Different Types of Tiles

Different tiles require specific cleaning techniques to ensure optimal results without causing any damage.

Cleaning ceramic tiles

Ceramic tiles are popular for their durability and versatility. To clean ceramic tiles, apply the chosen cleaning solution to the surface. Allow the solution for a few minutes to break down any stubborn grime. Then, use the tile cleaning machine, following the manufacturer’s instructions, to gently scrub the tiles. Pay extra attention to high-traffic areas and ensure thorough coverage.

Cleaning porcelain tiles

Porcelain tiles are known for their water resistance and low maintenance nature. Start by removing loose debris from the surface using a broom or vacuum cleaner. Apply the appropriate cleaning solution and use the tile cleaning machine with a medium to high brush rotation speed. Be cautious not to damage the tiles, especially if they have a glossy finish. Rinse the tiles thoroughly after cleaning to remove any residue.

Cleaning natural stone tiles

Natural stone tiles natural stone tiles like granite or marble require extra care. Before using a tile cleaning machine, ensure the chosen cleaning solution is suitable for natural stone. Avoid abrasive materials that can scratch the surface. Adjust the machine to a gentler setting and proceed with caution. After cleaning, dry the tiles immediately to prevent water spots or stains.

Step-by-Step Tile Cleaning Process

Step-by-Step Tile Cleaning Process

Now that you’re familiar with the machine and different tile types let’s walk through the step-by-step tile cleaning process.

Clearing the area and removing loose debris

Begin by clearing the area of any furniture or obstacles. This allows for easier maneuvering of the tile cleaning machine and ensures thorough cleaning of the entire tiled surface. Next, remove loose debris by sweeping or vacuuming the area.

Pre-treating tough stains and grime

For tough stains or grime, pre-treat the affected areas before using the tile cleaning machine. Apply a small amount of the appropriate cleaning solution directly to the stain, allowing it to penetrate and loosen the dirt. Give it some time to work before proceeding with the tile cleaning process.

Using the tile cleaning machine effectively

Once the surface is prepared, it’s time to use the tile cleaning machine. Fill the machine’s assortment with the recommended cleaning solution and water according to the producer instructions. Start in one corner of the room and work towards the exit, using smooth, overlapping strokes with the machine. Be thorough in covering the entire tiled area, paying close attention to high-traffic zones and areas prone to stains or grime buildup.

Navigating corners and edges

When cleaning corners and edges, you may need to switch to a smaller brush or utilize the machine’s attachments specifically designed for these areas. Take your time to ensure thorough cleaning without damaging adjacent surfaces or fixtures.

Handling hard-to-reach areas

In some cases, there may be areas that are challenging to reach with the tile cleaning machine. In such instances, consider using alternative cleaning techniques such as hand scrubbing or using a small, handheld steam cleaner. Be meticulous in targeting these areas to maintain overall cleanliness.

Dealing with Stubborn Stains and Grout

Despite thorough cleaning, you may still need help with stubborn stains or dirty grout lines. Here are some suggestions for managing with effectively.

Understanding common stain types

Different types of stains require specific treatment methods. Common stain types include food and beverage, oil-based, mold and mildew, and hard water stains. Identify the stain type to choose the most appropriate cleaning technique.

Applying targeted cleaning techniques

Consider using a specialized stain remover or preparing a homemade solution for tough stains. Ensure the chosen method is compatible with your tile type to prevent damage. Follow the provided instructions and apply the solution directly to the stain. Allow it to sit for the recommended duration, then gently scrub or wipe away the loosened stain.

Restoring and maintaining grout cleanliness

Grout lines can accumulate dirt and grime over time, diminishing the overall appearance of your tiled surface. To restore cleanliness, use a grout cleaner and a small brush to remove any built-up residue. Consider sealing the grout after cleaning to provide extra protection against future staining.

Drying and Finishing Touches

Once the tile cleaning process is complete, it’s crucial to dry the tiles properly and add finishing touches for a pristine appearance.

properly drying the tiles

After cleaning, ensure the tiles are thoroughly dried to prevent water spots or stains—open windows or doors to promote air circulation and aid in drying. You can also use fans or absorbent towels to speed up drying.

Buffing and polishing for a pristine finish

For an extra touch of brilliance, consider buffing and polishing your tiles. Use a clean, dry cloth or a buffing machine to buff the tiles in circular motions gently. This process can help restore shine and give your tiles a professional finish.

Troubleshooting and Maintenance

Even with proper usage, tile cleaning machines may encounter common issues.There are some suggestions for solving this problems to help you fix them.

Common issues and their solutions

  • Low water pressure: Check the water supply and ensure it’s adequate. Clean or replace clogged filters or nozzles if necessary.
  • Streaks or smears on tiles: This may indicate excessive cleaning solution residue. Rinse the tiles thoroughly with clean water after cleaning to remove any residue.
  • Machine not working: Double-check that the power supply is connected properly. Inspect the machine for any visible issues or clogs hindering its operation.

Routine cleaning machine maintenance

Regular maintenance is essential to ensure the longevity and optimal performance of your tile cleaning machine. Refer to the machine’s user manual for specific maintenance instructions, such as cleaning filters, replacing brushes or pads, and lubricating moving parts. Following a maintenance routine will help you avoid potential problems and increase the life of your machine.

Tips and Best Practices for Tile Cleaning

To further enhance your tile cleaning experience and achieve the best results, consider these additional tips and best practices:

1. Use white vinegar as a natural, mild cleaning solution for regular maintenance.

2. Avoid using brushes or scrubbers with abrasive bristles on delicate tiles.

3. Periodically inspect grout lines for signs of wear or damage—repair or re-grout as necessary to maintain a clean and seamless appearance.

4. Place mats or rugs in high-traffic areas to prevent dirt and grime from being tracked onto the tiles.

5. Clean up spills or stains promptly to prevent them from setting in.

Tips for Best Results from Tile Cleaning Machine

Tips and Best Practices for Tile Cleaning

To achieve the best possible outcome when using a Tile floor cleaning machine, consider the following information:

Work in Sections: Divide the floor into manageable sections to ensure thorough cleaning without missing any spots.
Start from the Farthest Corner: Begin cleaning from the farthest corner of the room, moving toward the exit. This way, you won’t step on the cleaned areas.

Be Mindful of the Amount of Cleaning Solution You Use: Use the recommended cleaning solution to avoid excessive moisture on the floor and minimize drying time.

Be Careful Around Grout Lines: Take extra care when cleaning around grout lines to prevent any damage or dislodging of the grout.
Change Out the Water and Solution Regularly: Empty and refill the Machine’s tank with clean water and fresh cleaning solution to maintain optimal cleaning performance.

Frequently Asked Questions(FAQs)

As you embark on your tile cleaning journey, you may have some common questions. Here are the answers to frequently asked questions:

The frequency of cleaning depends on factors such as foot traffic and level of soiling. As a general guideline, regular maintenance cleaning every one to two weeks is recommended, with deeper cleaning every few months or as needed.

It’s crucial to use cleaning solutions that are specifically formulated for use with tile cleaning machines. These solutions effectively remove dirt and stains without damaging the tiles or the machine. Always refer to the manufacturer’s recommendations for the most suitable cleaning solutions.

The frequency of tile cleaning with a machine depends on several factors, including the usage level of the tiled area and the presence of stains or grime buildup. As a general guideline, it’s recommended to clean high-traffic areas at least once every two weeks and thoroughly clean the entire tiled area every few months or as needed. Regular maintenance and prompt stain removal can minimize the need for frequent deep cleaning.

Tile cleaning machines are generally suitable for most types of tiles. However, it’s crucial to consider the specific requirements and recommendations for each tile type. Delicate tiles, such as terracotta or handmade tiles, may require more gentle cleaning methods to prevent damage. Always refer to the manufacturer’s guidelines and perform a patch test on a small, inconspicuous area before using a tile cleaning machine on unfamiliar tile types.

Renting a tile cleaning machine can be a viable option, especially if you have a one-time cleaning project or want to evaluate its effectiveness before investing in one. Renting allows you to access professional-grade machines without a long-term commitment. on the other hand, it’s important to note that pay availability may change, and long-term usage make purchasing a machine a more cost-effective option in the long run.

Conclusion

With this comprehensive guide, you now possess the necessary knowledge to confidently and effectively use a tile cleaning machine. From understanding the machine’s functionality and selecting appropriate cleaning solutions to mastering step-by-step cleaning techniques and troubleshooting tips, you can achieve a sparkling, professional finish for your tiles. Follow the best practices, explore time-saving techniques, and prioritize routine maintenance to ensure long-lasting tile brilliance.

Remember to refer to the manufacturer’s guidelines and recommendations for your specific tile cleaning machine and type, as they may provide additional insights or precautions. Happy tile cleaning!

paper towel clogged toilet

How to Deal with a Paper Towel Clogged Toilet In 6 Easy Ways

We can help you with some tips on how to deal with a paper towel clogged toilet. Paper towels are unsuitable for flushing down the bathroom due to their thicker, absorbent nature and potential to cause pipe blockages. Here are some possible ways to unclog a toilet with paper towels in it.

Use a plunger: A plunger is a simple and effective tool that can create suction and pressure to dislodge the paper towels. To use a plunger, make sure there is enough water in the toilet bowl to cover the rubber part of the plunger. The plunger should then be placed over the drain hole, and you should gently push and pull it. It vigorously several times. You may hear a gurgling sound or the water level drop, indicating the clog is cleared. If not, repeat the process until the toilet flushes normally.

Use a toilet auger: A toilet auger is a long metal coil with a crank handle and a hook at the end. It can reach deeper into the pipes, break up, or pull out the paper towels. To use a toilet auger, insert the coil end into the toilet bowl and push it gently until you feel some resistance. Then, turn the crank handle clockwise to rotate the coil and hook the paper towels. Pull the auger back slowly and carefully, removing the paper towels from the toilet. Repeat this until you clear the clog.

Use dish soap and hot water: Hot water and dish soap can help soften and dissolve the paper towels, making them easier to flush away. To use this method, boil some water in a kettle or a pot and add dish soap. Pour hot water into the toilet bowl slowly, avoiding splashing or overflowing. Allow it to sit for 15 minutes before flushing the toilet. If it doesn’t work, repeat the process until it does.

These are some common methods for fixing a toilet clogged with paper towels. For more information, you can check out these web search results.

Can paper towel clogged toilet be flushed down a garbage disposal?

paper towel clogged toilet

No, paper towels should not be flushed down a garbage disposal. Paper towels are unsuitable for removal due to their thicker, absorbent nature and potential to cause pipe blockages. According to one of the web search results, any non-food items, including paper towels, plastic wrappers, or tissues, can be a big problem for your drainage system. These substances can enter your drainage system and accumulate in your local water supply. If something isn’t biodegradable, it shouldn’t go down the disposal. Therefore, throw paper towels in the trash or compost them if possible.

How can I properly dispose of paper towels?

dispose of paper towels

Paper towels are not recyclable, so you cannot dispose of them in the recycling bin. However, there are other ways to properly dispose of paper towels, depending on their condition and usage. Here are some tips:

  • If the paper towels are clean and dry, you can compost them in your own backyard or at a local composting facility. Composting paper towels can help reduce waste in landfills and improve soil health. However, you should avoid composting paper towels with oil, grease, meat, dairy, or chemicals, as they can attract pests and harm the composting process.
  • If the paper towels are damp, you can dry them out in a well-ventilated area away from heat sources and then dispose of them in the trash. paper towel-clogged toilet drying can reduce the emission of methane, a greenhouse gas that accelerates climate change.
  • To clean oily or greasy paper towels, soak them in water and store them in a metal container with a tight lid until ready to be disposed of. Oily paper towels can pose a fire hazard if left unattended, as they can spontaneously combust due to oxidation. It would be best to never flush oily paper towels down the toilet or the garbage disposal, as they can clog the pipes and damage the plumbing system.

These are some of the common methods for disposing of paper towel-clogged toilet properly. For more information, you can check out these web search results.

What chemical dissolves paper towels?

What chemical dissolves paper towels

Paper towels are made of cellulose fibers, which are long chains of glucose molecules. When paper towels come into contact with water, the water molecules break apart the cellulose chains and dissolve them.

Acids have a stronger ability to break apart cellulose chains than water molecules do, so acids can quickly dissolve paper towels. Some common household chemicals that are acidic include vinegar, lemon juice, and soda.

It’s important to note that some of these chemicals may be toxic, corrosive, or both. So, it’s imperative to be extra cautious when handling them.

If you’re looking for a safer option, you can use hot water to dissolve paper towels. Water molecules arrange themselves around the fibers that make up paper towel and loosen them up, allowing them to break down faster.

What is the best chemical to dissolve toilet paper?

Toilet paper is made of cellulose fibers, which are long chains of glucose molecules. When toilet paper comes into contact with water, the water molecules break apart the cellulose chains and dissolve them.

Acids have a stronger ability to break apart cellulose chains than water molecules do, so acids can quickly dissolve toilet paper. Some common household chemicals that are acidic include vinegar, lemon juice, and soda

According to a source, some of the most effective household chemicals that dissolve toilet paper include:

Dishwashing Soap: Dishwashing soap is an effective lubricant, which softens toilet paper to enable it to slide down the drain. It works best with hot water as hot water improves the dissolution of toilet paper in the drain.

Bleach: Bleach works by breaking down toilet paper into tiny particles which can pass easily down the toilet drain. The best part is that bleach is a good disinfectant, which kills germs around your toilet seat. Note, however, that bleach can choke you, and so you should wear a mask when handling it.

Vinegar + Baking Soda: Vinegar and baking soda are both acidic and can dissolve toilet paper effectively. To use this method, pour a cup of baking soda into the toilet bowl followed by two cups of vinegar. Wait for 30 minutes before flushing normally.

Coke/Coca-Cola or Pepsi: Coke or Pepsi contain phosphoric acid, which can dissolve toilet paper effectively. Pour a 2-liter bottle of coke or Pepsi into the toilet bowl and let it sit for an hour before flushing normally.

Aspirin: Aspirin forms acetic acid and salicylic acid when exposed to water. These acids work to dissolve paper effectively. Dissolve 4-6 tablets of aspirin in water and pour it into the toilet bowl.

It’s important to note that some of these chemicals may be toxic, corrosive, or both. So, it’s imperative to be extra cautious when handling them.

How long does it take paper towels to dissolve in water?

Paper Towel Clogged Toilet

Paper towels are made of cellulose fibers, which are long chains of glucose molecules. When paper towels come into contact with water, the water molecules break apart the cellulose chains and dissolve them.

The time it takes for paper towels to dissolve in water depends on several factors, including the quality of the paper towel, the amount of water present, and the porosity of the paper towel.

According to a source, standard paper towels made from wood pulp will take approximately 20 minutes to dissolve in water. However, this may vary depending on the porosity of the paper towel, the temperature of the water, and how much water is present.

It’s important to note that paper towels are not designed to dissolve in water and will only break down into smaller pieces over time. Flushing paper towels down the toilet can cause clogs that are difficult to remove . Therefore, it’s best to dispose of paper towels correctly by throwing them out in the bin or composting them.

How can I reduce my overall paper towel usage?

That’s a great question! Reducing your overall paper towel usage can help you save money, save trees, and reduce waste. Here are some tips on how to use fewer paper towels in different situations:

In the kitchen: Paper towels can be substituted with reusable kitchen goods such as kitchen towels, microfiber cloths, or cloth napkins for spill cleanup, dish drying, and countertop cleaning. These can be washed and reused many times, and they are more durable and absorbent than paper towels. You can also make your Paper Towel Clogged Toilets by cutting up old t-shirts or towels and sewing them together.

In the bathroom: Instead of using paper towels to dry your hands or face, use a hand towel or washcloth. These can also be washed and reused, and they are softer and gentler on your skin than paper towels. Utilizing a squeegee to clean shower walls and doors after each use can significantly reduce the need for Paper Towel Clogged Toilets.

In public places: Instead of using Paper Towel Clogged Toilets to dry your hands in a public restroom, airport, or office, you can use an air dryer whenever possible. Air dryers are more hygienic and eco-friendly than paper towels, as they do not create waste or spread germs. If no air dryer is available, you can use the “shake and fold” rule: Shake your hands 12 times to remove excess water, then take one paper towel-clogged toilet and fold it in half. This will create enough surface area and absorbency to dry your hands with one sheet.

These are some of the common ways to reduce your overall paper towel-clogged toilet usage. For more information, you can check out these web search results.

How can I recycle used paper towels?

dispose of paper towels

Unfortunately, you cannot recycle used paper towels. According to one of the web search results, paper towels are not fit for the recycle bin for two main reasons: the manufacturing process and the contamination of the product itself.Paper Towel Clogged Toilets are made from wood, cardboard, and paper by-products that are processed into a pulp, which weakens and breaks down their natural fibres. They also undergo chemical treatments that add glues, resins, softeners, inks, and bleach to the paper fibres. These factors make it harder to recycle paper towels at a later time. Moreover, paper towel clogged toilet are always contaminated with residue, food waste, or cleaning chemicals after they are used for wiping or cleaning. This makes them unsuitable for recycling as well.

However, there are other ways to properly dispose of used paper towels, depending on their condition and usage. Here are some tips:

  • If the Paper Towel Clogged Toilets are clean and dry, you can compost them in your own backyard or at a local composting facility. Composting paper towels can help reduce waste in landfills and improve soil health. However, it would help to avoid composting Paper Towel Clogged Toilet soiled with oil, grease, meat, dairy, or chemicals, as they can attract pests and harm the composting process.
  • If the paper towels are damp, you can dry them out in a well-ventilated area away from heat sources and then dispose of them in the trash. paper towel clogged toilet can stop releasing methane, a greenhouse gas that contributes to climate change, by being dried.
  • Until you have enough to transfer to a hazardous waste disposal facility, you can soak greasy or oily Paper Towel Clogged Toilets in water and store them in a metal container with a tight top. Oily paper towel clogged toilet can pose a fire hazard if left unattended, as they can spontaneously combust due to oxidation. It would help if you never flushed oily paper towels down the toilet or the garbage disposal, as they can clog the pipes and damage the plumbing system.

These are some of the common methods for disposing of paper towel clogged toilet properly. For more information, you can check out these web search results.

The Final Words

A paper towel clogged toilet can be a frustrating and messy problem to deal with. However, there are possible ways to fix it without calling a plumber. Use a plunger, toilet auger, hot water, or dish soap to clear blockages in your toilet, which are simple, effective, and inexpensive, saving time and money. However, the best way to prevent this problem from happening again is to avoid flushing paper towels down the toilet in the first place. Due to their thicker, more absorbent texture and potential for blocking pipes, paper towels should not be flushed. Therefore, you should always dispose of Paper Towel Clogged Toilet in the trash or compost them if possible. This way, you can keep your toilet running smoothly and protect the environment.

We can help you with some tips on how to deal with a paper towel clogged toilet. Paper towels are unsuitable for flushing down the bathroom due to their thicker, absorbent nature and potential to cause pipe blockages. Here are some possible ways to unclog a toilet with paper towels in it:

  • Use a plunger: A plunger is a simple and effective tool that can create suction and pressure to dislodge the paper towels. To use a plunger, make sure there is enough water in the toilet bowl to cover the rubber part of the plunger. The plunger should then be placed over the drain hole, and you should gently push and pull it. It vigorously several times. You may hear a gurgling sound or the water level drop, indicating the clog is cleared. If not, repeat the process until the toilet flushes normally.
  • Use a toilet auger: A toilet auger is a long metal coil with a crank handle and a hook at the end. It can reach deeper into the pipes, break up, or pull out the paper towels. To use a toilet auger, insert the coil end into the toilet bowl and push it gently until you feel some resistance. Then, turn the crank handle clockwise to rotate the coil and hook the paper towels. Pull the auger back slowly and carefully, removing the paper towels from the toilet. Repeat this until you clear the clog.
  • Use dish soap and hot water: Hot water and dish soap can help soften and dissolve the paper towels, making them easier to flush away. To use this method, boil some water in a kettle or a pot and add dish soap. Pour hot water into the toilet bowl slowly, avoiding splashing or overflowing. Allow it to sit for 15 minutes before flushing the toilet. If it doesn’t work, repeat the process until it does.

These are some common methods for fixing a toilet clogged with paper towels. For more information, you can check out these web search results.

Can paper towel clogged toilet be flushed down a garbage disposal?

paper towel clogged toilet

No, paper towels should not be flushed down a garbage disposal. Paper towels are unsuitable for removal due to their thicker, absorbent nature and potential to cause pipe blockages. According to one of the web search results, any non-food items, including paper towels, plastic wrappers, or tissues, can be a big problem for your drainage system. These substances can enter your drainage system and accumulate in your local water supply. If something isn’t biodegradable, it shouldn’t go down the disposal. Therefore, throw paper towels in the trash or compost them if possible.

How can I properly dispose of paper towels?

dispose of paper towels

Paper towels are not recyclable, so you cannot dispose of them in the recycling bin. However, there are other ways to properly dispose of paper towels, depending on their condition and usage. Here are some tips:

  • If the paper towels are clean and dry, you can compost them in your own backyard or at a local composting facility. Composting paper towels can help reduce waste in landfills and improve soil health. However, you should avoid composting paper towels with oil, grease, meat, dairy, or chemicals, as they can attract pests and harm the composting process.
  • If the paper towels are damp, you can dry them out in a well-ventilated area away from heat sources and then dispose of them in the trash. paper towel-clogged toilet drying can reduce the emission of methane, a greenhouse gas that accelerates climate change.
  • To clean oily or greasy paper towels, soak them in water and store them in a metal container with a tight lid until ready to be disposed of. Oily paper towels can pose a fire hazard if left unattended, as they can spontaneously combust due to oxidation. It would be best to never flush oily paper towels down the toilet or the garbage disposal, as they can clog the pipes and damage the plumbing system.

These are some of the common methods for disposing of paper towel-clogged toilet properly. For more information, you can check out these web search results.

What chemical dissolves paper towels?

What chemical dissolves paper towels

Paper towels are made of cellulose fibers, which are long chains of glucose molecules. When paper towels come into contact with water, the water molecules break apart the cellulose chains and dissolve them ³.

Acids have a stronger ability to break apart cellulose chains than water molecules do, so acids can quickly dissolve paper towels. Some common household chemicals that are acidic include vinegar, lemon juice, and soda.

It’s important to note that some of these chemicals may be toxic, corrosive, or both. So, it’s imperative to be extra cautious when handling them ⁶.

If you’re looking for a safer option, you can use hot water to dissolve paper towels. Water molecules arrange themselves around the fibers that make up paper towel and loosen them up, allowing them to break down faster.

What is the best chemical to dissolve toilet paper?

Toilet paper is made of cellulose fibers, which are long chains of glucose molecules. When toilet paper comes into contact with water, the water molecules break apart the cellulose chains and dissolve them.

Acids have a stronger ability to break apart cellulose chains than water molecules do, so acids can quickly dissolve toilet paper. Some common household chemicals that are acidic include vinegar, lemon juice, and soda

According to a source, some of the most effective household chemicals that dissolve toilet paper include:

Dishwashing Soap: Dishwashing soap is an effective lubricant, which softens toilet paper to enable it to slide down the drain. It works best with hot water as hot water improves the dissolution of toilet paper in the drain.

Bleach: Bleach works by breaking down toilet paper into tiny particles which can pass easily down the toilet drain. The best part is that bleach is a good disinfectant, which kills germs around your toilet seat. Note, however, that bleach can choke you, and so you should wear a mask when handling it.

Vinegar + Baking Soda: Vinegar and baking soda are both acidic and can dissolve toilet paper effectively. To use this method, pour a cup of baking soda into the toilet bowl followed by two cups of vinegar. Wait for 30 minutes before flushing normally.

Coke/Coca-Cola or Pepsi: Coke or Pepsi contain phosphoric acid, which can dissolve toilet paper effectively. Pour a 2-liter bottle of coke or Pepsi into the toilet bowl and let it sit for an hour before flushing normally.

Aspirin: Aspirin forms acetic acid and salicylic acid when exposed to water. These acids work to dissolve paper effectively. Dissolve 4-6 tablets of aspirin in water and pour it into the toilet bowl.

It’s important to note that some of these chemicals may be toxic, corrosive, or both. So, it’s imperative to be extra cautious when handling them.

How long does it take paper towels to dissolve in water?

Paper Towel Clogged Toilet

Paper towels are made of cellulose fibers, which are long chains of glucose molecules. When paper towels come into contact with water, the water molecules break apart the cellulose chains and dissolve them.

The time it takes for paper towels to dissolve in water depends on several factors, including the quality of the paper towel, the amount of water present, and the porosity of the paper towel.

According to a source, standard paper towels made from wood pulp will take approximately 20 minutes to dissolve in water. However, this may vary depending on the porosity of the paper towel, the temperature of the water, and how much water is present.

It’s important to note that paper towels are not designed to dissolve in water and will only break down into smaller pieces over time. Flushing paper towels down the toilet can cause clogs that are difficult to remove . Therefore, it’s best to dispose of paper towels correctly by throwing them out in the bin or composting them.

How can I reduce my overall paper towel usage?

That’s a great question! Reducing your overall paper towel usage can help you save money, save trees, and reduce waste. Here are some tips on how to use fewer paper towels in different situations:

  • In the kitchen: Paper towels can be substituted with reusable kitchen goods such as kitchen towels, microfiber cloths, or cloth napkins for spill cleanup, dish drying, and countertop cleaning. These can be washed and reused many times, and they are more durable and absorbent than paper towels. You can also make your Paper Towel Clogged Toilets by cutting up old t-shirts or towels and sewing them together.
  • In the bathroom: Instead of using paper towels to dry your hands or face, use a hand towel or washcloth. These can also be washed and reused, and they are softer and gentler on your skin than paper towels. Utilizing a squeegee to clean shower walls and doors after each use can significantly reduce the need for Paper Towel Clogged Toilets.
  • In public places: Instead of using Paper Towel Clogged Toilets to dry your hands in a public restroom, airport, or office, you can use an air dryer whenever possible. Air dryers are more hygienic and eco-friendly than paper towels, as they do not create waste or spread germs. If no air dryer is available, you can use the “shake and fold” rule: Shake your hands 12 times to remove excess water, then take one paper towel-clogged toilet and fold it in half. This will create enough surface area and absorbency to dry your hands with one sheet.

These are some of the common ways to reduce your overall paper towel-clogged toilet usage. For more information, you can check out these web search results.

How can I recycle used paper towels?

Paper Towel Clogged Toilet

Unfortunately, you cannot recycle used paper towels. According to one of the web search results, paper towels are not fit for the recycle bin for two main reasons: the manufacturing process and the contamination of the product itself.Paper Towel Clogged Toilets are made from wood, cardboard, and paper by-products that are processed into a pulp, which weakens and breaks down their natural fibres. They also undergo chemical treatments that add glues, resins, softeners, inks, and bleach to the paper fibres. These factors make it harder to recycle paper towels at a later time. Moreover, paper towel clogged toilet are always contaminated with residue, food waste, or cleaning chemicals after they are used for wiping or cleaning. This makes them unsuitable for recycling as well.

However, there are other ways to properly dispose of used paper towels, depending on their condition and usage. Here are some tips:

  • If the Paper Towel Clogged Toilets are clean and dry, you can compost them in your own backyard or at a local composting facility. Composting paper towels can help reduce waste in landfills and improve soil health. However, it would help to avoid composting Paper Towel Clogged Toilet soiled with oil, grease, meat, dairy, or chemicals, as they can attract pests and harm the composting process.
  • If the paper towels are damp, you can dry them out in a well-ventilated area away from heat sources and then dispose of them in the trash. paper towel clogged toilet can stop releasing methane, a greenhouse gas that contributes to climate change, by being dried.
  • Until you have enough to transfer to a hazardous waste disposal facility, you can soak greasy or oily Paper Towel Clogged Toilets in water and store them in a metal container with a tight top. Oily paper towel clogged toilet can pose a fire hazard if left unattended, as they can spontaneously combust due to oxidation. It would help if you never flushed oily paper towels down the toilet or the garbage disposal, as they can clog the pipes and damage the plumbing system.

These are some of the common methods for disposing of paper towel clogged toilet properly. For more information, you can check out these web search results.

The Final Words

A paper towel clogged toilet can be a frustrating and messy problem to deal with. However, there are possible ways to fix it without calling a plumber. Use a plunger, toilet auger, hot water, or dish soap to clear blockages in your toilet, which are simple, effective, and inexpensive, saving time and money. However, the best way to prevent this problem from happening again is to avoid flushing paper towels down the toilet in the first place. Due to their thicker, more absorbent texture and potential for blocking pipes, paper towels should not be flushed. Therefore, you should always dispose of Paper Towel Clogged Toilet in the trash or compost them if possible. This way, you can keep your toilet running smoothly and protect the environment.